Fun fact, on January 4th, 2024 (exactly one year ago), my first article of the year was about Maas. Starting 2025, on the same day, with another article about a solution that aims to automate infrastructure, especially bare metal, is funny :)
Context
I won!!!

I occasionally play games on social media (less often now) and I also sometimes enter contests at conferences.
And there, I won a one-year subscription to Sidero Labs’ SaaS (the creators of Talos Linux), Omni.
For those wondering, Omni is a Kubernetes cluster deployment solution that allows you to orchestrate servers running Talos, a minimalist and secure Linux operating system dedicated to Kubernetes. As for Talos, we’ll certainly talk about it in future articles.
What Does This Have to Do with Oracle Cloud?
Winning is great, it’s always nice. But what do I do with this SaaS now?
The first idea that comes to mind is to order a dedicated server somewhere and install Talos on it (with an ISO generated by Omni), or do the same thing but install a hypervisor, then create Talos Linux VMs (again, thanks to Omni).
But I’m cheap eternally frugal and I saw that Oracle Cloud Infrastructure (OCI) is supported by Talos Linux and Omni, so I wanted to try it.
For those who don’t know OCI, I wrote a series of articles in 2023 explaining how to create a free cluster with kubeadm on the (quite generous) free tier:
- A free Kubernetes cluster for your personal labs! - part 1
- A free Kubernetes cluster for your personal labs! - part 2
We’re going to reuse the free tier here, but to deploy and manage clusters with Omni.
Note: you can reread them, but I’ve done better since then because I managed to integrate free tier machines INTO a managed Kubernetes cluster, which is much nicer to use. Stay tuned for the upcoming article ;).
Prerequisites
For Talos Linux on Oracle Cloud Infrastructure (OCI) and more specifically integrating machines with Omni, there are a few necessary configuration steps.
Note: this tutorial is partially based on the official Talos Linux documentation, adapted for Omni and with additional details on Oracle Cloud Infrastructure.
I’m assuming you already have an account on Oracle Cloud Infrastructure, as well as the talosctl binaries and the oci CLI. Otherwise, a quick:
brew update && brew install oci-cli talosctl
Authenticate with the CLI tool:
oci session authenticate
When authentication is requested, choose the region corresponding to your location (for example, eu-paris-1). Once done, you’ll see a confirmation message in the browser and you’ll need to give a cute name to the profile for oci in the terminal and validate.
Retrieving the Compartment ID
One of the interesting concepts of Oracle Cloud Infrastructure (found in other cloud providers in one form or another) is the notion of “compartment”. Basically, resources are stored in “compartments” to organize resources.
You can work in the “root” compartment, but it’s cleaner to create a specific one for the occasion.
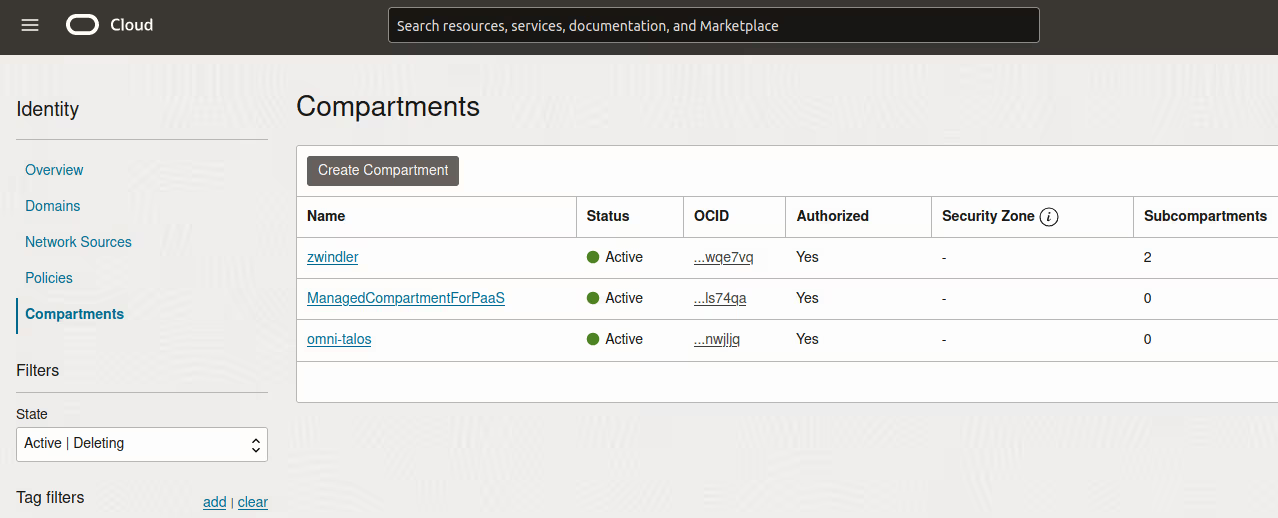
Example OCID:
ocid1.compartment.oc1..aaaaaaaayrmiilkb5m2b7never345435gonna345give87978you12upu6ifoh6csihm4awsjq
Preparing the Oracle Cloud Environment
Once we have that, we’ll use the CLI to create all the things we’ll need for our virtual machines to register on Omni’s SaaS.
Creating a VCN (Virtual Cloud Network) and network configuration:
export cidr_block=10.0.0.0/16
export subnet_block=10.0.0.0/24
export compartment_id=<your_ocid_compartment>
Create the VCN and subnet:
export vcn_id=$(oci network vcn create --cidr-block $cidr_block --display-name talos-example --compartment-id $compartment_id --query data.id --raw-output)
export rt_id=$(oci network subnet create --cidr-block $subnet_block --display-name kubernetes --compartment-id $compartment_id --vcn-id $vcn_id --query data.route-table-id --raw-output)
After the 2nd command, we retrieve not the OCID of the subnet (we don’t need it), but that of the “Route Table”, a subcomponent of the subnet, which allows defining the routing table of the subnet we just created.
Configure a gateway (Internet Gateway):
export ig_id=$(oci network internet-gateway create --compartment-id $compartment_id --is-enabled true --vcn-id $vcn_id --query data.id --raw-output)
Add a routing rule (to our route table) to allow Internet access:
oci network route-table update --rt-id $rt_id --route-rules "[{\"cidrBlock\":\"0.0.0.0/0\",\"networkEntityId\":\"$ig_id\"}]" --force
Disable default firewall rules (YOLO):
export sl_id=$(oci network vcn list --compartment-id $compartment_id --query 'data[0]."default-security-list-id"' --raw-output)
From there, we have the functional network part, ready to host our machines!
But It’s Not Over Yet :-/
With Oracle Cloud Infrastructure, it’s possible to boot a list of predefined OSes, but in our case, Talos Linux is not on the list.
Fortunately, Omni will generate a preconfigured virtual disk with our credentials, which will allow us to enroll Talos Linux servers to our Omni SaaS from the first boot. Classy 😎.
So we connect to our Omni interface and download the appropriate Talos Linux image:
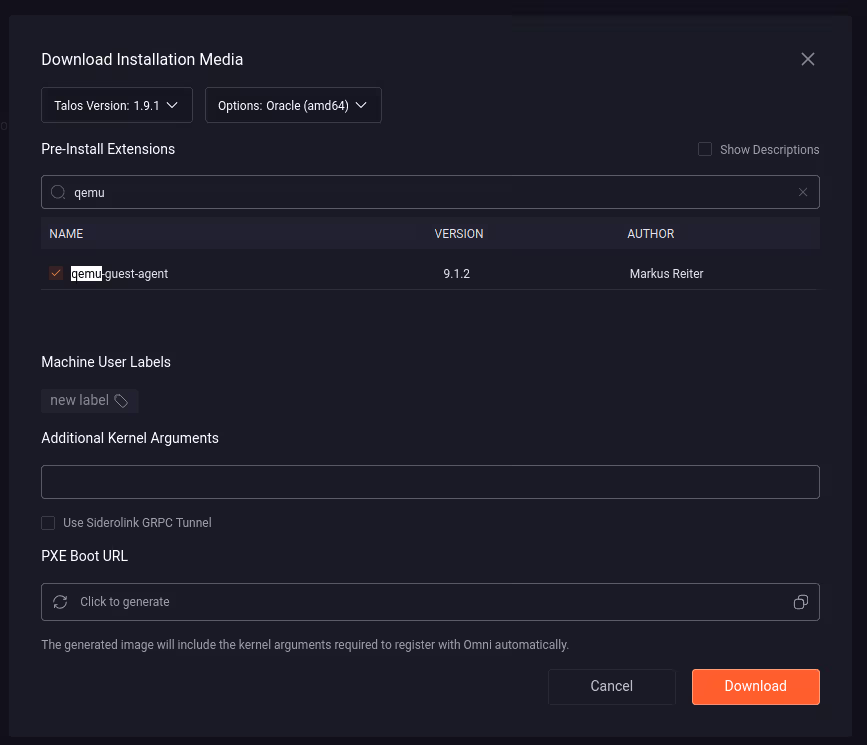
Here, I chose version 1.9.1 (the very latest because we like danger), for amd64 architecture. I retrieve the image oracle-amd64-omni-zwindler-v1.9.1.qcow2.xz which I decompress:
xz --decompress ./oracle-amd64-omni-zwindler-v1.9.1.qcow2.xz
Reminder: OCI’s free tier consists of:
- 2 amd64 machines with 1 oCPU (= vCPU) and 1 GB of RAM each
- a flexible combination of arm64 instances having 1 x n oCPU and 6 x n GB, as long as the total doesn’t exceed 4 oCPU (and therefore 6x4 = 24 GB of RAM).
On OCI, there are several formats for importing disks. The simplest is to use OCI’s “homemade” format (the .oci, super original name), which consists of a metadata file and the QCOW2.
Create the metadata file for import, with the VM.Standard.E2.1.Micro shape since we have an amd64 image (otherwise it’s VM.Standard.A1.Flex):
cat > image_metadata.json << EOF
{
    "version": 2,
    "externalLaunchOptions": {
        "firmware": "UEFI_64",
        "networkType": "PARAVIRTUALIZED",
        "bootVolumeType": "PARAVIRTUALIZED",
        "remoteDataVolumeType": "PARAVIRTUALIZED",
        "localDataVolumeType": "PARAVIRTUALIZED",
        "launchOptionsSource": "PARAVIRTUALIZED",
        "pvAttachmentVersion": 2,
        "pvEncryptionInTransitEnabled": true,
        "consistentVolumeNamingEnabled": true
    },
    "imageCapabilityData": null,
    "imageCapsFormatVersion": null,
    "operatingSystem": "Talos",
    "operatingSystemVersion": "1.9.1",
    "additionalMetadata": {
        "shapeCompatibilities": [
            {
                "internalShapeName": "VM.Standard.E2.1.Micro",
                "ocpuConstraints": null,
                "memoryConstraints": null
            }
        ]
    }
}
EOF
And then create the image for import:
qemu-img convert -f raw -O qcow2 oracle-amd64-omni-zwindler-v1.9.1.raw oracle-amd64-omni-zwindler-v1.9.1.qcow2
tar zcf oracle-amd64-omni-zwindler-v1.9.1.oci oracle-amd64-omni-zwindler-v1.9.1.qcow2 image_metadata.json
Importing the Image to Oracle Cloud
We have the file ready to be uploaded… but where do we upload it??
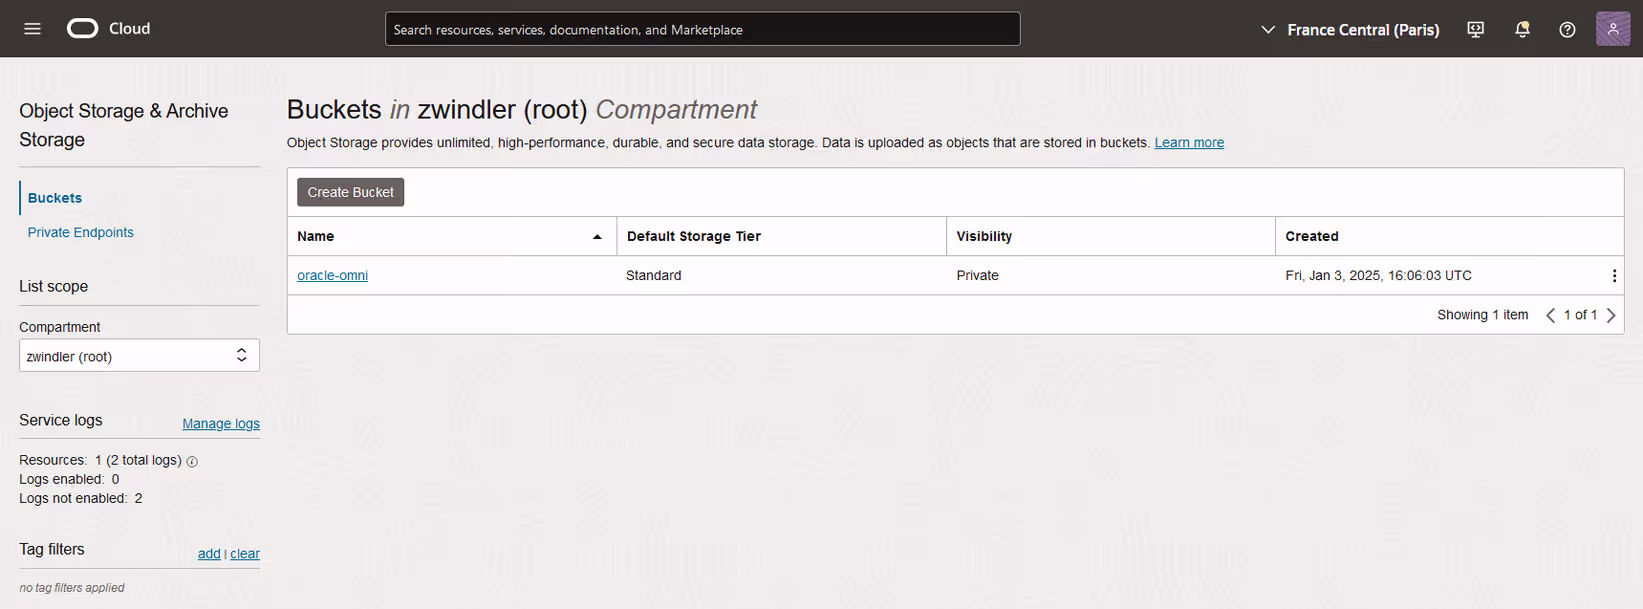
Unfortunately, this step is done in 2 parts. First, you need to upload the .oci file to a bucket. It’s quite simple to do in the UI (we could also do it via CLI):
- Create a bucket in the Storage section to upload the compressed image.
- Upload the image (oracle-amd64-omni-zwindler-v1.9.1.oci) to this bucket.
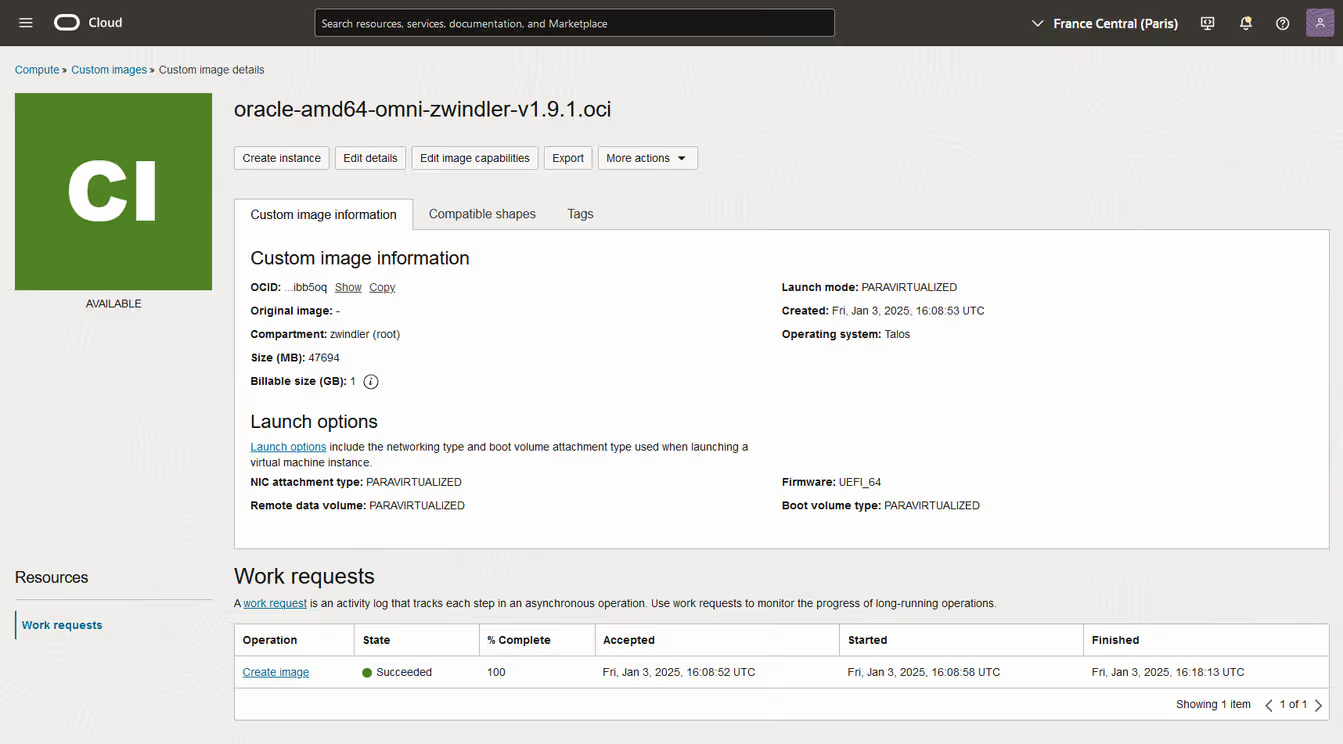
Second step, we transform the file into “Custom images” (in the Compute section):

This step is oddly quite long, the image which is only 100 MB took 10 minutes each time I tried so far.
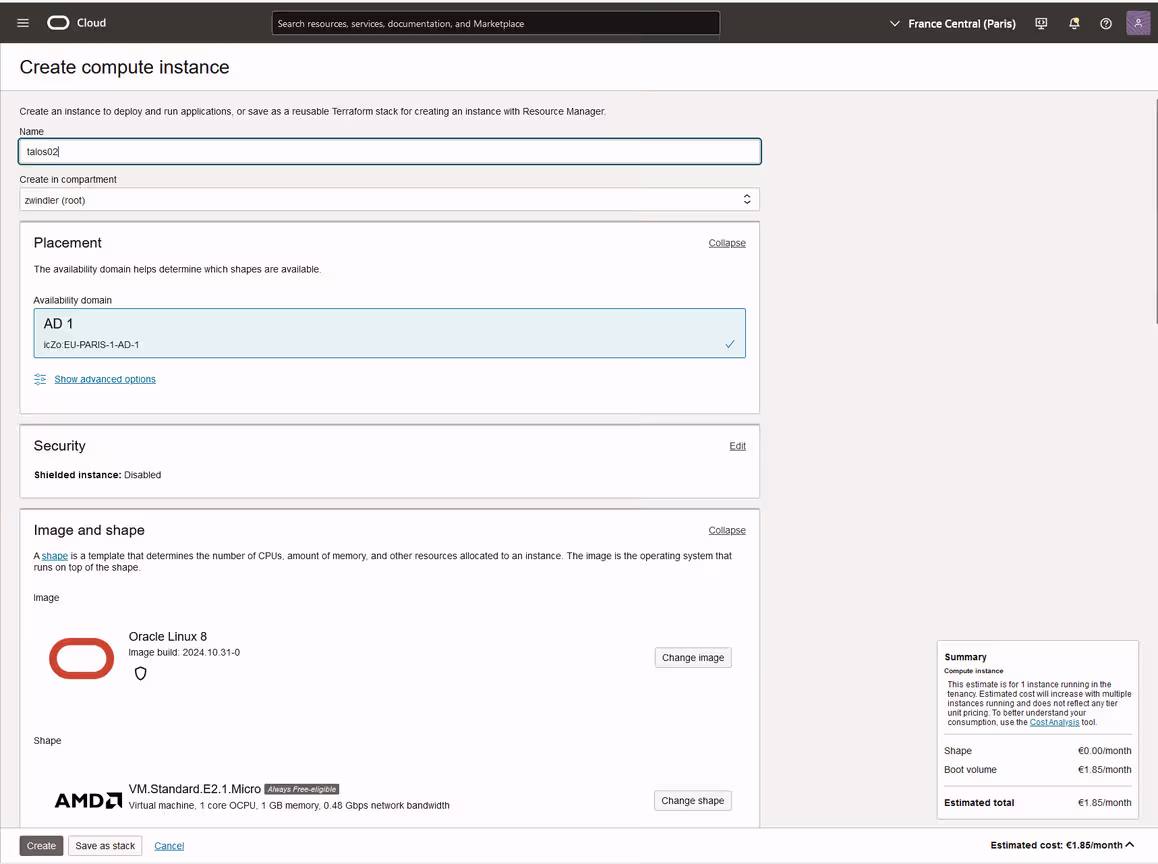
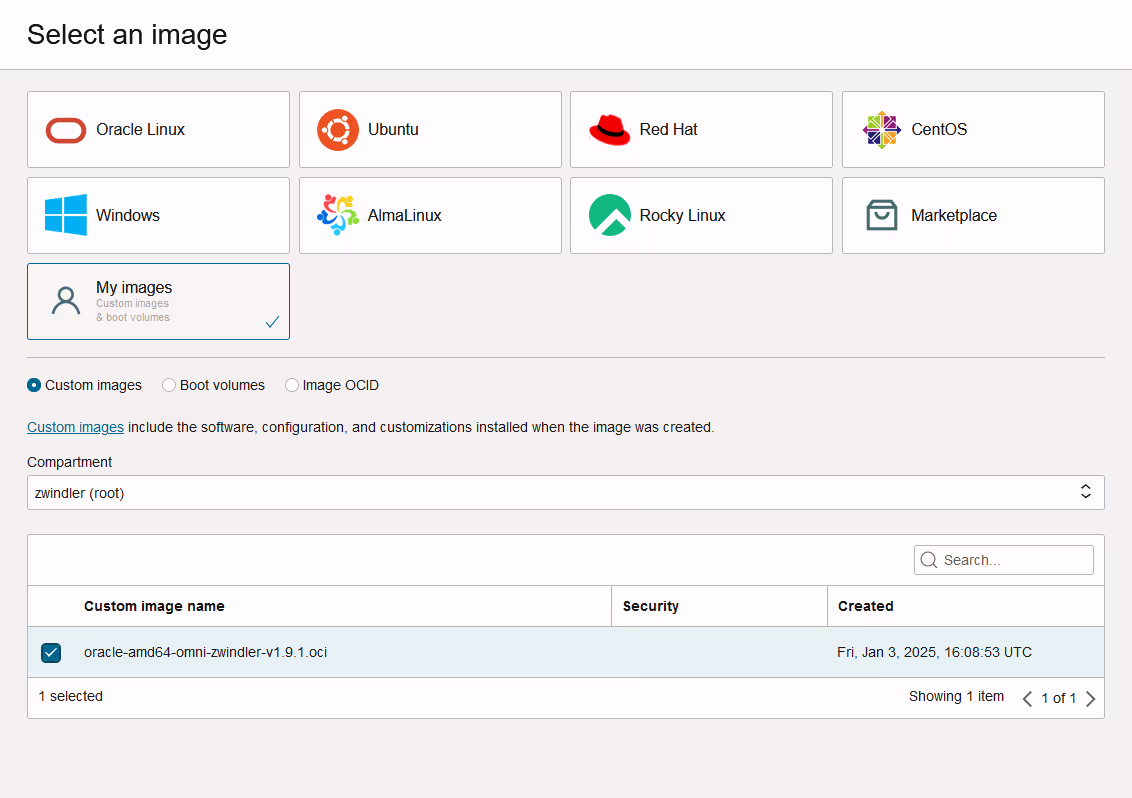
Creating the VM
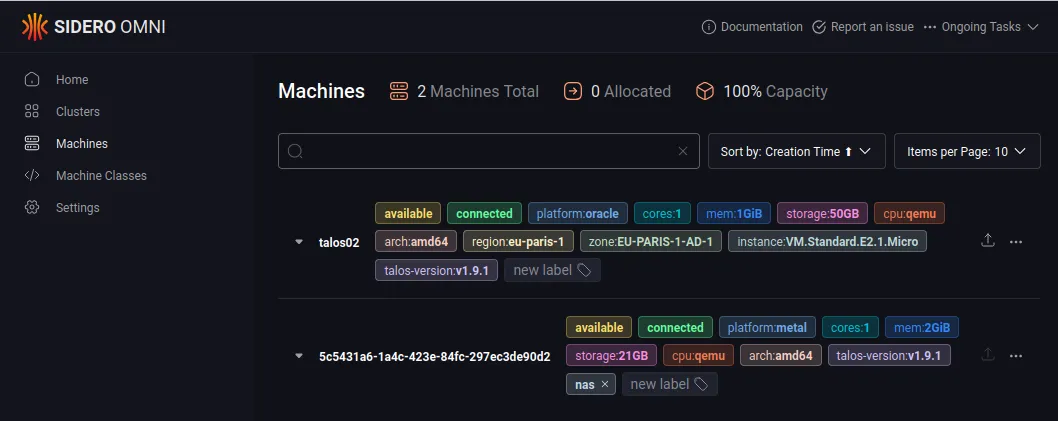
Once the image is imported, we can now use our Omni-customized image to boot our free tier machines.
I also did this through the OCI interface, but again, we could do it via CLI.
A few seconds after boot, it appears in Omni’s UI and can be added to a cluster.
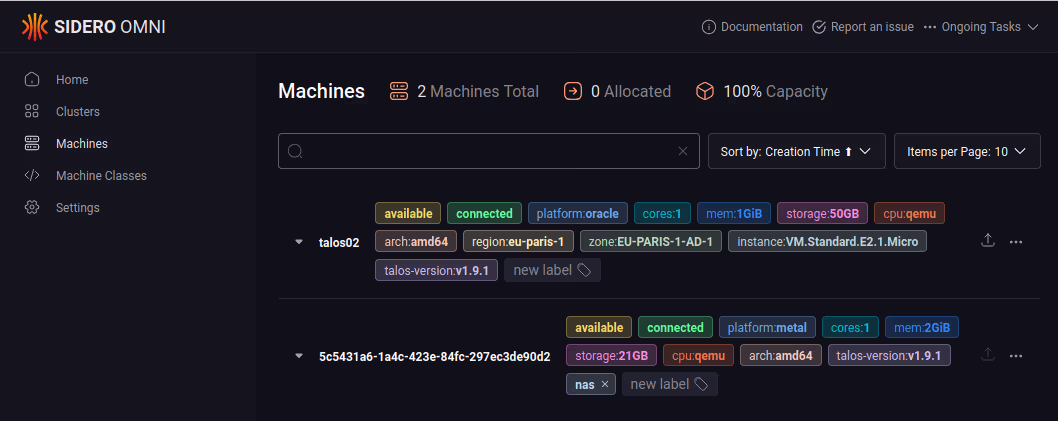
Have fun!!
Addendum: Is It Really Free?
Yes…-ish.
In theory, the machines are free (forever free as they say). But beware, lots of little things can be paid.
For example, the bucket where we uploaded the QCOW2/.oci is most likely paid. Same for the custom image, which is billed as 1 GB of storage (according to the UI, I don’t have the bill yet LOL).
If you put the VMs behind a load balancer (there’s no reason you’d do that here), be careful, only the “non-flexible” LB capped at 10 Mbps is free (and only one).
And if like me, you already have 4 x 50 GB disks, the OS storage is paid (€1.85 / month).
In short, as you’ve understood, it’s like often in the cloud, nothing is really free and you have to read all the fine print.