
Note - this article is part of a series:
- Deploying a Proxmox VE 8 Cluster on Dedicated Servers (1/4)
- Deploying a Proxmox VE 8 Cluster on Dedicated Servers (2/4)
- Deploying a Proxmox VE 8 Cluster on Dedicated Servers (3/4)
- Special Edition - SDN in VXLAN Mode with Machines on the Internet
- And at least one more to come
Introduction
Those who follow the “lore” of this blog know that I’m somewhat known in the Sunday tinkerer community for having written (or co-written) several tutorials on Proxmox VE. I’m thinking in particular of two article series on Proxmox VE 5, then Proxmox VE 6, to create a virtualization cluster from scratch with Proxmox VE (and pfSense at the time).
This is a new iteration of these tutorials, this time based on Proxmox VE 8, with quite a few things changing and new approaches.
The ultimate goal of this article series is to have a virtualization platform with Proxmox VE. This platform will be composed of several machines (ideally 3, but 2 works too), secured, monitored, highly available, and backed up.
You’ll need to follow several articles to achieve this.
Starting Assumptions
1- I’m assuming you don’t have machines to do this at home and don’t want or can’t afford to invest in a homelab (even though it can be a lot of fun, it requires investment). However, if you have machines at home, a large part of this article remains valid, once the machines are installed.
2- Since Proxmox VE is a virtualization platform, I’m also assuming you want dedicated (physical) machines and not virtual machines, precisely to be able to virtualize entire OSes without too many problems (even though we always have the “nested virt” option, it’s less ideal).
Note: if you don’t need virtualization (example: no Windows or special OS), Proxmox VE is a great containerization platform, particularly thanks to LXC, which allows you to create Linux containers with a full OS, that you can manage exactly like a VM but with much better performance (and some limitations due to kernel sharing, but it’s often sufficient). You can read my articles on LXC if you’re interested.
3- I’d like to draw your attention to the fact that many actions could have been scripted or managed via “infrastructure as code”. It’s more in tune with the times, because it’s more robust and reliable. However, the point of this article is to do it “by hand” to understand what we’re doing, step by step, not just provide you with a “turnkey” infrastructure that you won’t know how to manage at the first hiccup.
If you’re looking for more industrial methods to deploy virtualization clusters, you’ll surely find plenty on the Internet, from other bloggers (some French, some are even friends).
I’ve actually done the exercise myself several times with Ansible or Rudder in the past, for example here (note: this code is obsolete):
Now that the objective and context is clear for everyone, we can begin :)
Choosing the Machines
Since we said we’re not self-hosting, we need to find a host that offers physical machines. Ideally, something not too expensive would be nice to start with.
So we’re going to look for inexpensive machines BUT with support for VT-x / AMD-v instructions, which is pretty much all CPUs that still work today EXCEPT Atoms and ARM machines like Raspberry.
Basically, that leaves us with Kimsufi at OVHCloud, Dedibox at Scaleway, and machines at Hetzner.
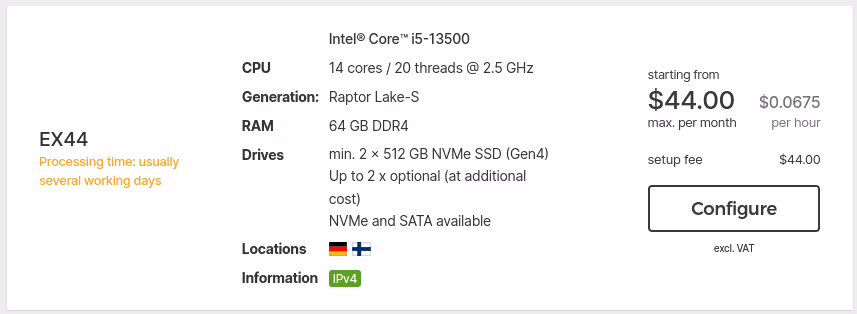
At Hetzner for €45, you get an i5 gen13, 64 GB of RAM and 2 NVMe SSDs.
At OVHcloud, with a bit of luck, you can find machines around €15-20 per month with older hardware, but more than sufficient for what we’re going to do.

At Scaleway, the entry-level offer is centered on Atom Avoton or very old Xeons. The Avoton C2750 remains a valid option, as it’s an octa-core that supports VT-x (unlike the C2350, beware!). But well, it’s 2013 hardware 💀…

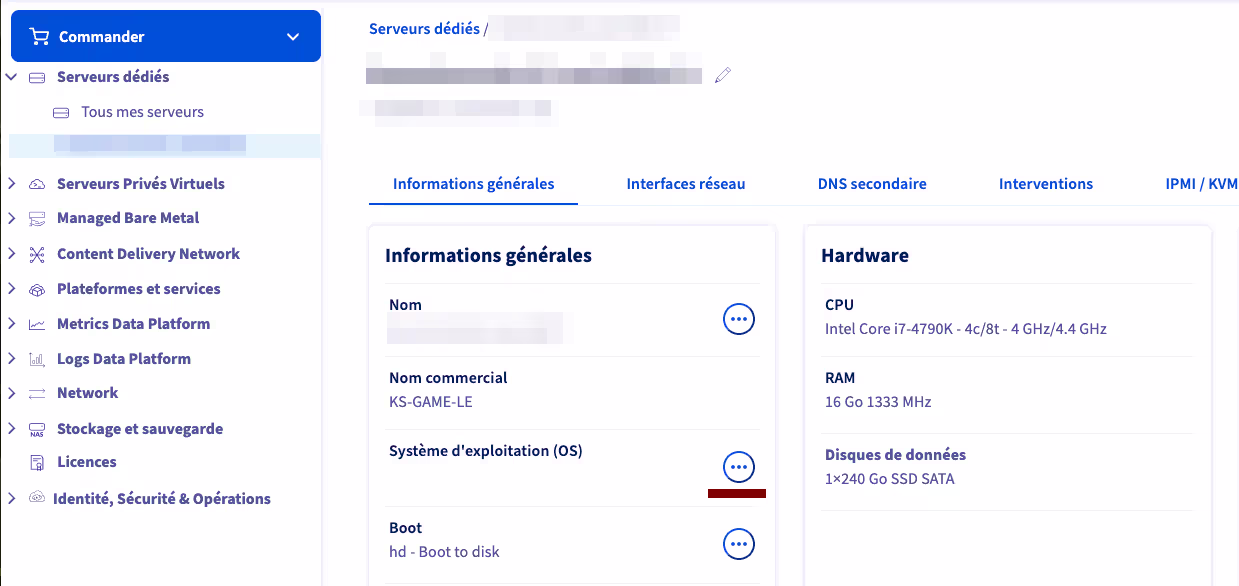
For the purposes of this article, I optimized costs and went with the OVHcloud server I present just above (KS-GAME-LE), unfortunately only available in Canada :(. But 8 threads and 16 GB of RAM for €12 including tax per month, that’s really not expensive.
Two downsides:
- ridiculously small storage for virtualization (only 240 GB, a single disk)
- latency - almost 100 ms from my place, compared to 11 ms for my other machine at Scaleway
64 bytes from proxmox.example.org (203.0.113.78): icmp_seq=1 ttl=53 time=98.0 ms
64 bytes from proxmox.example.org (203.0.113.78): icmp_seq=2 ttl=53 time=97.5 ms
64 bytes from proxmox.example.org (203.0.113.78): icmp_seq=3 ttl=53 time=97.6 ms
64 bytes from proxmox.example.org (203.0.113.78): icmp_seq=4 ttl=53 time=97.7 ms
64 bytes from proxmox.example.org (203.0.113.78): icmp_seq=5 ttl=53 time=97.7 ms
OS Installation
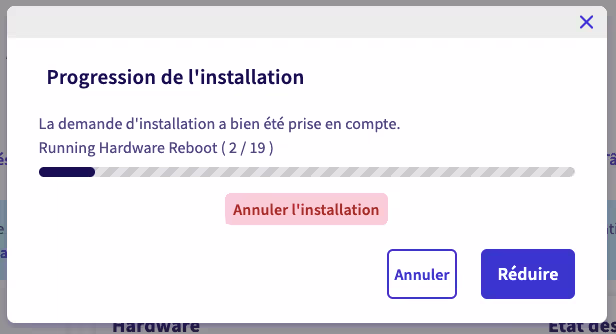
Once ordered, the server is relatively quickly available in your “OVH manager”. We have a fairly intuitive menu to directly install Proxmox VE 8, almost up to date (the provided images are rebuilt very regularly with all updates).
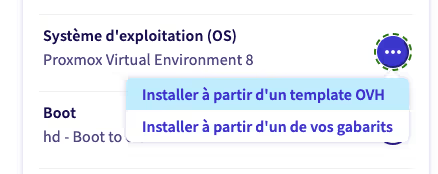
To start the installation, click on the “…” in the Operating System (OS) section, then select install from an OVH template
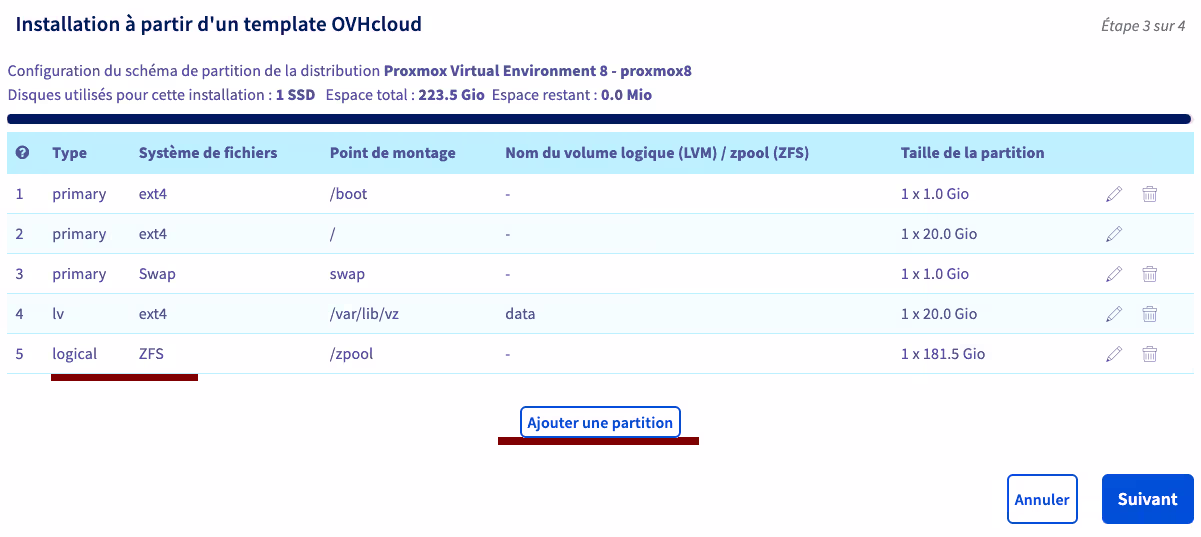
Scroll through the list of OS types, select Virtualization, then Proxmox VE 8 (while we’re at it). I also checked the “Customize partition configuration” box, because by default, OVH’s installation uses “LVM thick” type storage for most of the disk space, while we’ll use advanced ZFS features later:

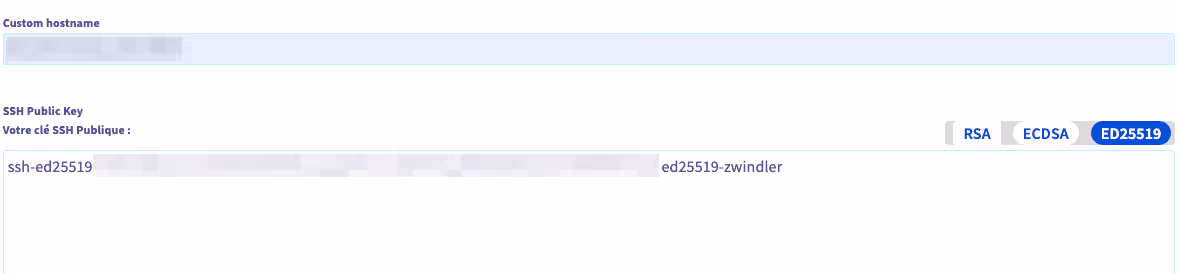
Before validating the installation, don’t forget to change its name (Custom hostname) to avoid having to do it post-install, then add a public SSH key:
First Post-Installation Tasks: Upgrade and Reboot
There’s a whole series of things to do when you’ve just installed a machine, especially on Proxmox VE, and we’ll try to resist the urge to “quickly” connect to the graphical interface.
Anyway, we won’t be able to connect to the Proxmox VE graphical interface…
Really???
Yes, because while we can normally connect with the root user of our Linux, we won’t be able to in the case of OVHcloud, simply because we DON’T have the root password. Good thing we added an SSH key ;)
We’ll come back to it later, we have more urgent things to do.
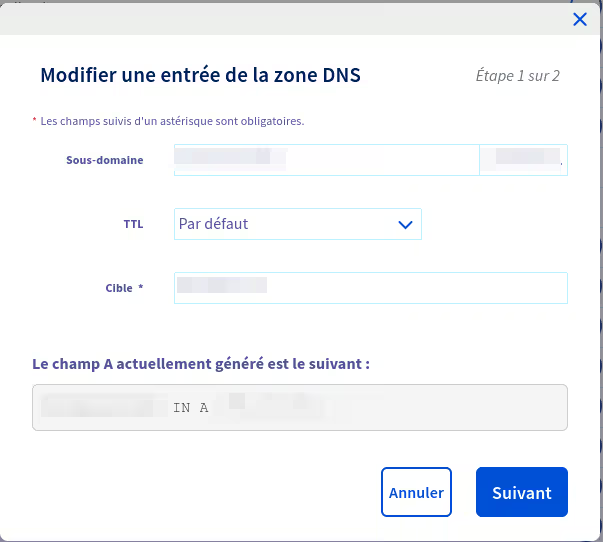
The first thing I did was immediately add a type A DNS record so that my machine’s IP corresponds to an FQDN. For this article, I’ll refer to it as follows:
- hostname: myPVEhost
- FQDN: proxmox.example.org
- IP: 203.0.113.159
So we connect to our freshly installed machine’s IP via SSH (root@IPmachine) and we’ll take the opportunity to do some cleanup.
The first thing to do is update the server, ideally followed by a reboot:
apt update && apt upgrade -y && reboot
Once the server is back to life, we reconnect and enable automatic updates in one way or another. The simplest is to use unattended-upgrades if it’s not installed by default (it may already be there) but there are more sophisticated tools.
apt install unattended-upgrades
It’s for Security
Once that’s done, I recommend installing CrowdSec right away. Here, I simply based myself on the official crowdsec documentation, to add the detection engine, the remediation component (here via iptables):
curl -s https://install.crowdsec.net | sudo sh
apt install crowdsec

# verify that the crowdsec service is working
systemctl status crowdsec
● crowdsec.service - Crowdsec agent
     Loaded: loaded (/lib/systemd/system/crowdsec.service; enabled; preset: enabled)
     Active: active (running) since Sun 2025-01-26 21:04:26 UTC; 1min 56s ago
    Process: 73830 ExecStartPre=/usr/bin/crowdsec -c /etc/crowdsec/config.yaml -t -error (code=exited, status=0/SUCCESS)
   Main PID: 73862 (crowdsec)
      Tasks: 13 (limit: 19059)
     Memory: 33.1M
        CPU: 2.571s
     CGroup: /system.slice/crowdsec.service
             ├─73862 /usr/bin/crowdsec -c /etc/crowdsec/config.yaml
             └─73877 journalctl --follow -n 0 _SYSTEMD_UNIT=ssh.service

Jan 26 21:04:23 myPVEhost systemd[1]: Starting crowdsec.service - Crowdsec agent...
Jan 26 21:04:26 myPVEhost systemd[1]: Started crowdsec.service - Crowdsec agent.

# install the remediation engine
apt install crowdsec-firewall-bouncer
Once Crowdsec is operational, we can add the “fulljackz/proxmox” collection, which we’ll need to modify (thanks to Julien Louis’s great article on his slash-root.fr blog), which will listen to the webUI logs to detect any brute force and ban those who try:
- https://app.crowdsec.net/hub/author/fulljackz/collections/proxmox
- slash-root.fr - CrowdSec: Protect Proxmox authentication
cscli collections install fulljackz/proxmox
[...]
INFO Enabled fulljackz/proxmox
INFO Run 'sudo systemctl reload crowdsec' for the new configuration to be effective.
The pattern listened to by the proxmox parser is no longer correct with new versions
Jan 26 21:23:14 myPVEhost pvedaemon[1250]: authentication failure; rhost=::ffff:203.0.113.159.78 user=coucou@pve msg=no such user ('coucou@pve')
We see here that Julien added the “::ffff:” prefix in the PVE_AUTH_FAIL variable of the /etc/crowdsec/parsers/s01-parse/proxmox-logs.yaml file, but when I look at the test cases provided in the collection, it seems like it’s not necessary…
In any case, we’ll create a /etc/crowdsec/acquis.d/proxmox.yaml file so that CrowdSec can start analyzing our logs:
mkdir -p /etc/crowdsec/acquis.d/
cat > /etc/crowdsec/acquis.d/proxmox.yaml <<EOF
journalctl_filter:
  - _SYSTEMD_UNIT=pvedaemon.service
labels:
  type: syslog
EOF
We finish by reloading crowdsec and watching the world burn script kiddies get blocked.
systemctl reload crowdsec

cscli alerts list
╭────┬────────────────────┬───────────────────────────┬─────────┬──────────────────────────────────────────────────────────────┬───────────┬─────────────────────────────────────────╮
│ ID │        value       │           reason          │ country │                              as                              │ decisions │                created_at               │
├────┼────────────────────┼───────────────────────────┼─────────┼──────────────────────────────────────────────────────────────┼───────────┼─────────────────────────────────────────┤
│ 2  │ Ip:203.0.113.222   │ crowdsecurity/ssh-slow-bf │ IR      │ 202468 Gloubi Bo ulgua Co. ( Private Joint Stock)            │ ban:1     │ 2025-01-26 22:31:15.366187524 +0000 UTC │
╰────┴────────────────────┴───────────────────────────┴─────────┴──────────────────────────────────────────────────────────────┴───────────┴─────────────────────────────────────────╯
Nagging Popup
Among the little annoying things shipped by default with Proxmox VE, there used to be the fact that Proxmox VE had enterprise apt repositories on all installations, and it was necessary to manually disable them before being able to do updates.
It was super annoying and the Proxmox VE developers heard (a little) their community and removed this requirement… to replace it with a popup.
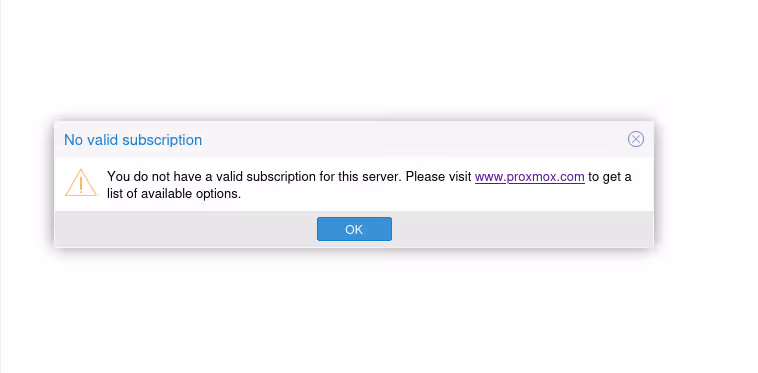
Now, a popup, I’m fine with that! It’s important to reward developers’ work and support them. But is it really necessary to do it at every login AND every time we refresh the list of packages to update?
This is obviously a rhetorical question.
Obviously, many people have found several methods to disable the responsible JS code. Big up to fabio for his version that works well.
sed -Ezi.bak "s/(function\(orig_cmd\) \{)/\1\n\torig_cmd\(\);\n\treturn;/g" /usr/share/javascript/proxmox-widget-toolkit/proxmoxlib.js && systemctl restart pveproxy.service
Note: if like me you’ve already connected once, you’ll also need to clear the cache otherwise the popup will remain…
Creating Groups and Users for the Graphical Interface
Ok ok, we’ve done a lot of stuff, can we connect now???
Yes yes, we can. Anyway, I’m already at almost 15,000 characters, this article is way too long, we need to wrap up.
Last step in this article, we’ll create an administrator to connect to the UI and a user that we’ll use later for monitoring.
# you're not **really** obligated to call the admin "zwindler" you know?
pveum group add admin -comment "System Administrators"
pveum acl modify / -group admin -role Administrator
pveum useradd zwindler@pve
pveum usermod zwindler@pve -group admin
pveum passwd zwindler@pve

# our monitoring user
pveum groupadd monitoring -comment 'Monitoring group'
pveum aclmod / -group monitoring -role PVEAuditor
pveum useradd pve_exporter@pve
pveum usermod pve_exporter@pve -group monitoring
pveum passwd pve_exporter@pve
Alright, you’ve waited long enough, you can connect to your Proxmox VE! Go to:
- https://@IPmachine:8006 or
- https://proxmox.example.org:8006
Note: for now, the certificate is self-signed and the browser will show an error. We can accept to ignore the problem for now.
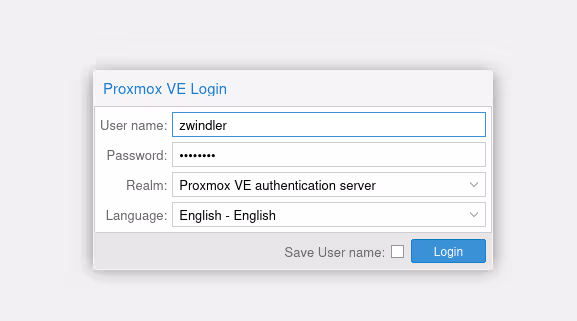
Don’t forget to change the “realm” from PAM (unix users, which we’re not using here) to “Proxmox” to be able to use the administrator we just created.
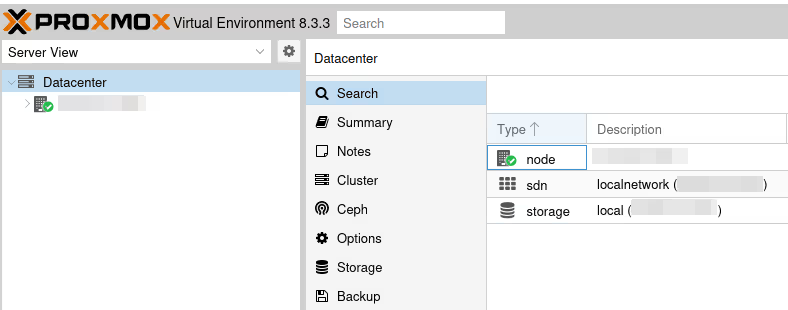
See you soon for the next part. And in the meantime, have fun!