Note - this article is part of a series:
- Deploying a Proxmox VE 8 Cluster on Dedicated Servers (1/4)
- Deploying a Proxmox VE 8 Cluster on Dedicated Servers (2/4)
- Deploying a Proxmox VE 8 Cluster on Dedicated Servers (3/4)
- Special Edition - SDN in VXLAN Mode with Machines on the Internet
- And at least one more to come
Picking Up Where We Left Off: First Steps in the UI
In the previous tutorial (which I invite you to read, if you haven’t already, otherwise this won’t be clear), we chose a dedicated physical server from a provider like OVHCloud or Hetzner. We then installed Proxmox VE in the latest version (8.x), configured some basic security options, added users and groups.
Now we can try connecting to the UI. The first thing that should strike you (💥 ouch!) is that the administration page is in HTTPS with a self-signed certificate. We’ll start by fixing that.
Something quite frustrating with Proxmox VE (but it’s probably for “good reasons” that I don’t know) is that some operations can’t be done in the UI if you connect with the admin account zwindler@pve that we created in the previous blog post.
This is typically true for updates, clustering, and configuration and… for certificate configuration (non-exhaustive list). So here, we’ll have to connect as root@pam for now and not as zwindler@pve…
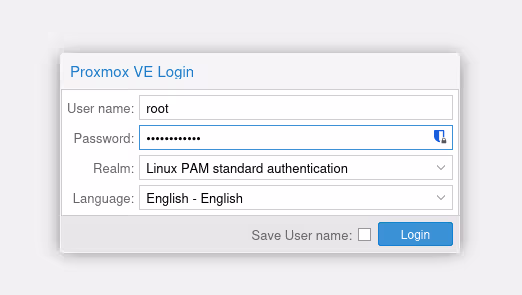
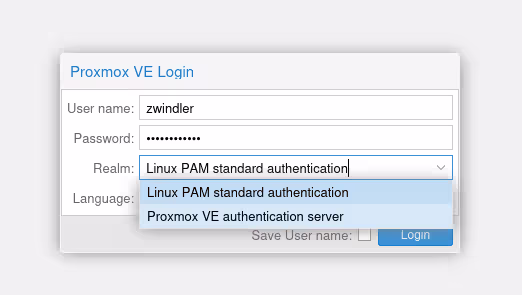
Note that there are (for now) 2 “realms”, Linux PAM (for root) and Proxmox VE Auth (for admin).
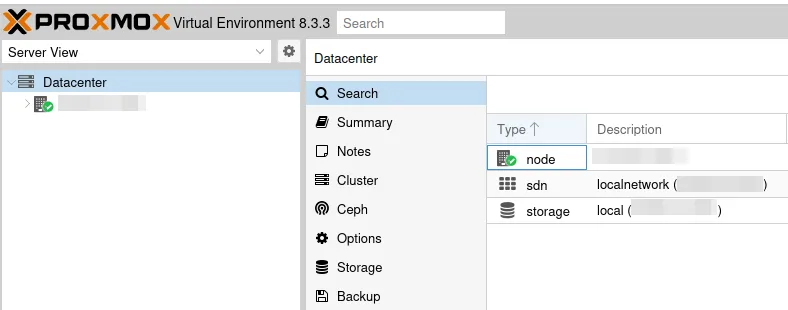
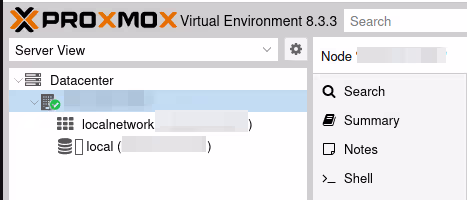
In the right bar, we find our server, which is for now alone in its datacenter (we’ll come back to this later). There are several views in the Proxmox VE UI, some things are hard to find if you don’t have this in mind. Here, I’m in the “server view”, probably the most classic if you come from the VMware world. In this menu, you’ll find your hypervisors and we can interact with each of them, how they are configured.
Once our server is selected, we have the main menu displaying many menus. Select System / Certificates.
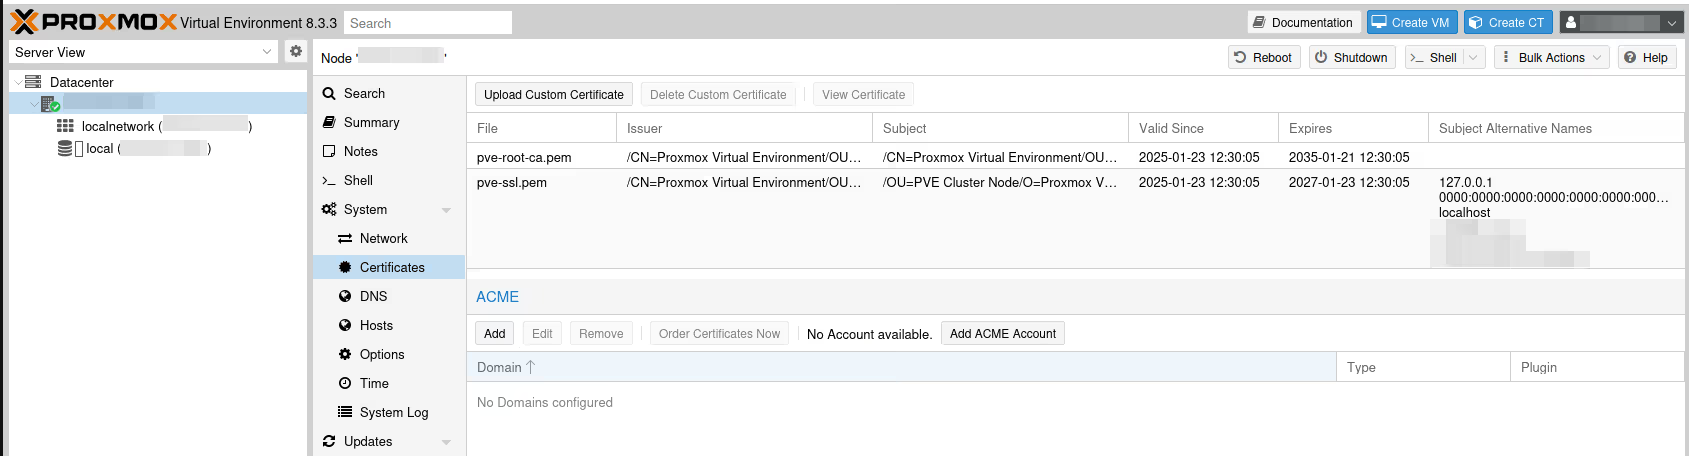
We’re in luck, Proxmox VE comes with a module to automatically order Let’s Encrypt certificates. If you have your own certificate that works too (button Upload Custom Certificate), of course, but I’ll assume you don’t have one, like me.
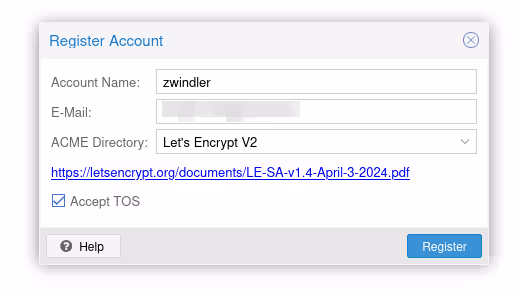
In the ACME section, click on Add ACME Account to register your email and accept the Let’s Encrypt Terms Of Service (TOS).
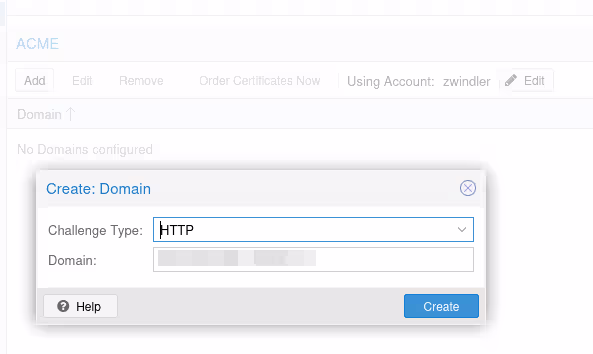
From there, add our server’s FQDN by clicking the Add button under ACME. The button was grayed out until we added an account.
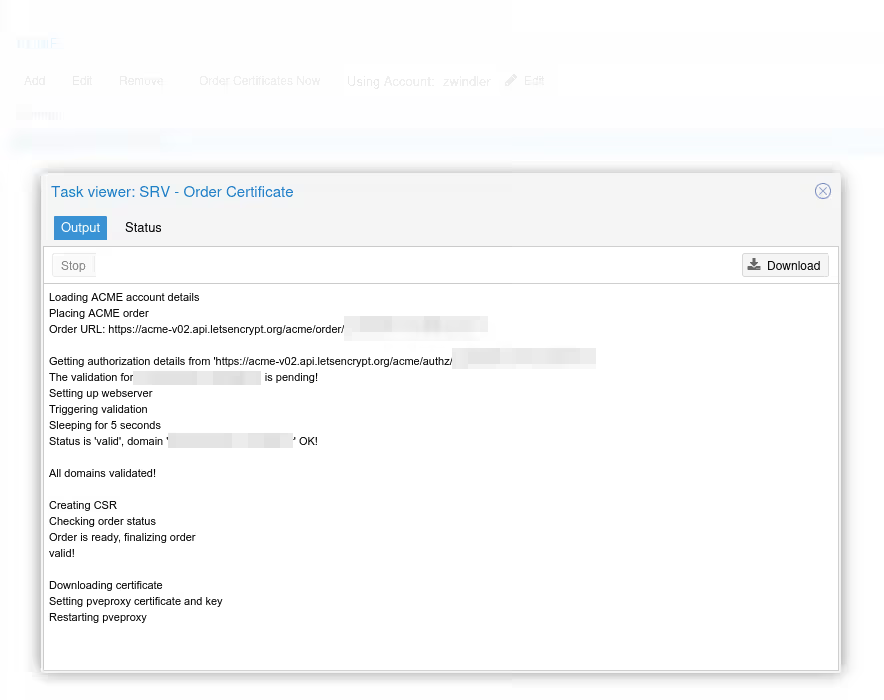
Now we can finally order the certificate by clicking on Order Certificates Now. If everything goes well, the certificate will be correctly delivered by Let’s Encrypt, and the pve-proxy server (which serves the Proxmox VE UI frontend) should restart, and your web page refresh, with a proper certificate this time :).
Storage / ZFS
If you read my blog often and I tell you that I’m an unconditional fan of ZFS, you won’t be surprised.
And if you read the previous article carefully, you’ll remember that we reduced the default partition of the OVHcloud template in LVM to be able to create a nice ZFS partition. But if we go to the storage view, it’s unfortunately not visible.

Small UI subtlety, the menu to add storage is found at the Datacenter level and not in the server configuration itself. In theory, storage management must be identical on all servers in the same DC in Proxmox VE, even if we can override this principle and set up exceptions for many versions already.
In Datacenter / Storage, click Add, then ZFS in the dropdown menu:
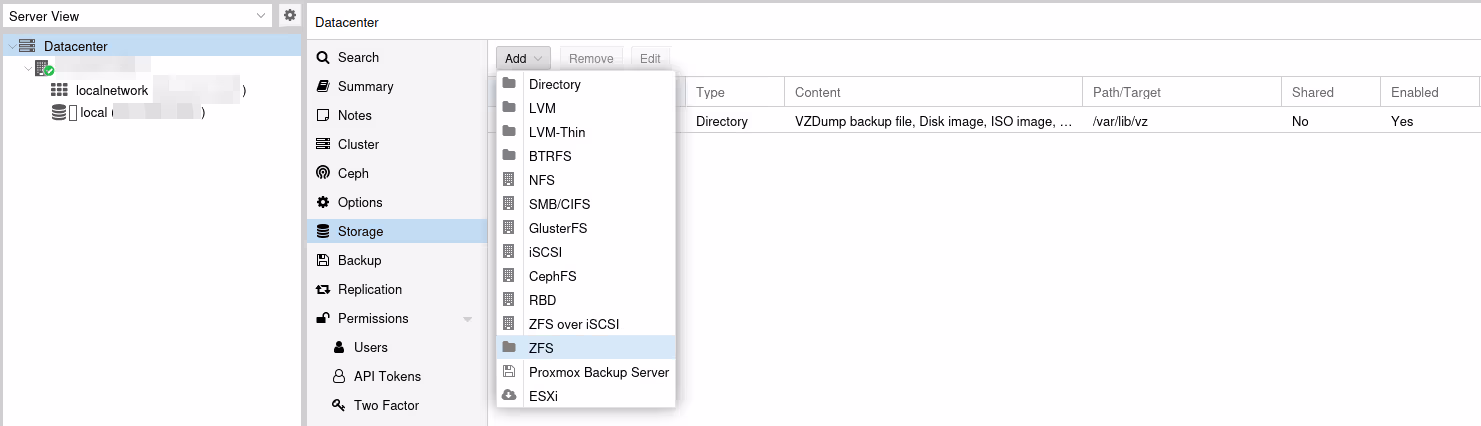
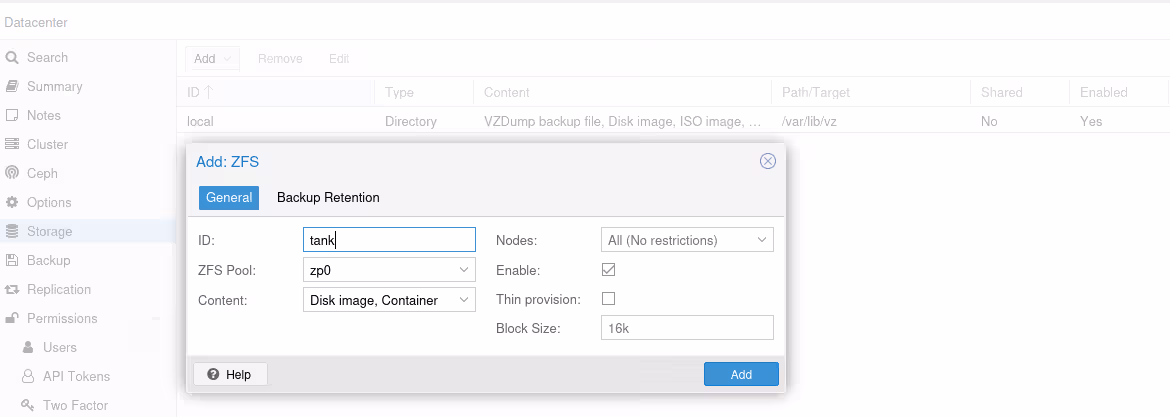
On ZFS type storage, we can only store “Disk images” and “Containers”, which won’t help us if we also want to store ISOs, templates, or backups.
We can settle for storing them on the default “local” storage.
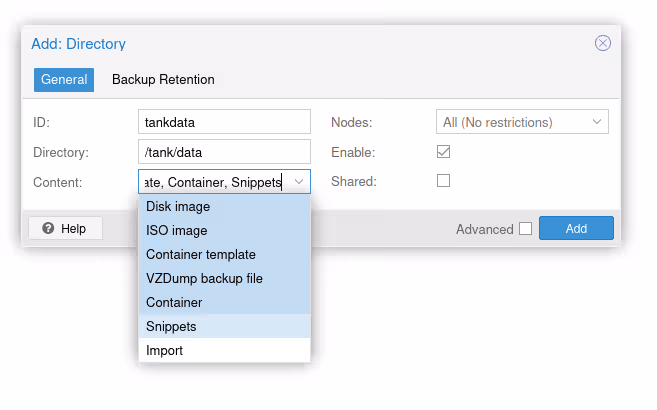
But we can also “cheat” by connecting to the server via SSH, creating a folder (/tank/data in my example), then creating a new Directory type storage that has no restriction on data types.
Let’s Talk About ZFS
I’ve banged my head countless times with people who persist in saying nonsense about ZFS, even after explaining it to them.
no, you don’t need ECC RAM to store things on ZFS. First, it’s a recommendation (probably a bit zealous) made by people who designed an extremely robust filesystem. Many production systems run with ZFS without ECC RAM. Second, it’s especially true if you do deduplication, because losing a block can have catastrophic consequences in such cases…
no, ZFS doesn’t require 1 GB of RAM per TB of disk, again, that’s only if you enable deduplication (to store the correspondence tables between hashes and blocks).
On the other hand, what is accurate is that by default, ZFS will try to use 50% of the available RAM on your server and use it as cache. In many administration software, including Proxmox VE, this value will be way too high for us, because RAM is a precious resource on a hypervisor.
That doesn’t mean this feature is useless. Having cache when you have unused RAM is always good. So, we’ll reduce this value to avoid resource conflicts between optimizing our storage performance and the number of VMs we can host.
# Restrict to 512MB
echo 536870912 | sudo tee -a /sys/module/zfs/parameters/zfs_arc_max

# Restrict to 4GB
echo 4294967296 | sudo tee -a /sys/module/zfs/parameters/zfs_arc_max
Note: this command will need to be persisted one way or another
Networking
Well… I tried to postpone as long as possible when we get to networking (because I hate it) but at some point, we’ll have to get to it…
By default, our Proxmox VE server is installed with a Linux bridge that will allow us to share network between our server’s physical interface and our virtual machines.
This setup works well on your local network with DHCP and your own local IPv4 LAN or if you have an IP range (whether v6 or v4) and something to assign them to virtual machines.
Unfortunately in my case, I only have one IPv4 (I could enable IPv6 but I’d have other issues and I prefer to keep it simple here). If I create VMs and assign them to the bridge, they won’t get an IP and won’t have Internet access.
There are several ways to connect virtual machines to the external network. If you have time, I recommend reading carefully the Proxmox VE Wiki which has a very good page listing the different possibilities.
In the previous articles on Proxmox VE 5 then Proxmox VE 6, we did complicated stuff with multiple bridges, DMZ, pfSense firewalling, and a hellish iptables script.
Just thinking about it, I’m already exhausted.
Fortunately, there has been a built-in firewall in Proxmox VE for several versions now, as well as an SDN that I’ve never taken the time to explore and I think this is the right tutorial to do it :).
So we’ll refer to the official documentation, and choose the “Masquerading (NAT) with iptables” mode, but with a simpler setup compared to before.
Danger Zone
Network interface configuration can theoretically be done directly from the UI rather than modifying configuration files (/etc/network/interfaces). In the server view, go to the System / Network menu:
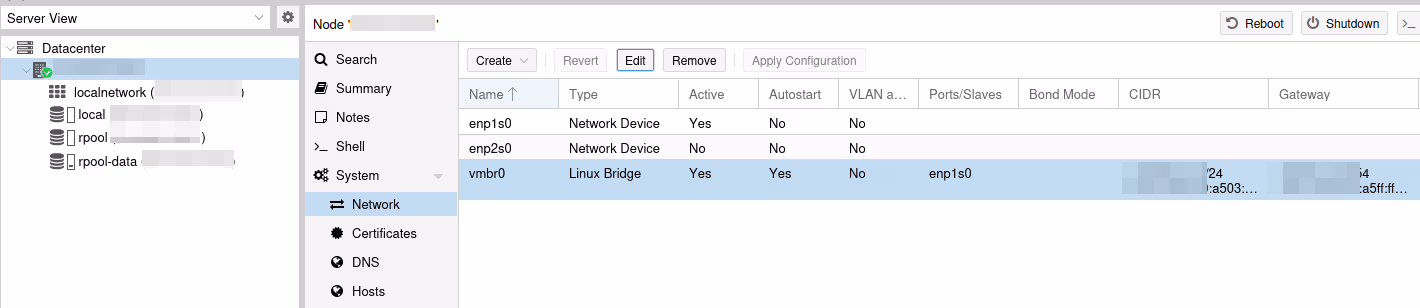
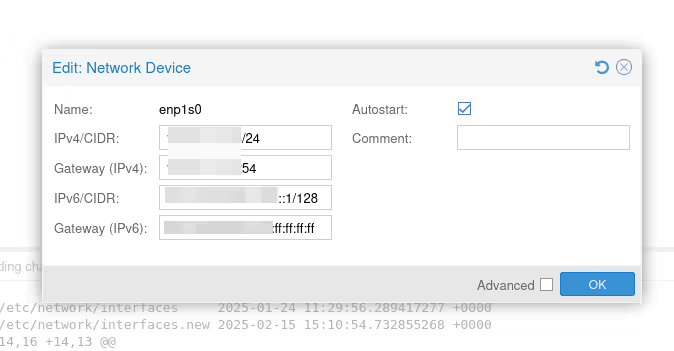
Here, you can see I wasn’t making things up, and we do have a bridge with our physical interface (here enp1s0).
(We even have an IPv6 range, oh my 🙈 I have no excuse… ANYWAY, let’s pretend we didn’t see that.)
We’re now at the fun part where we can easily cut ourselves off. I’ve done it often enough and had to go into rescue mode…
fun fun fun fun
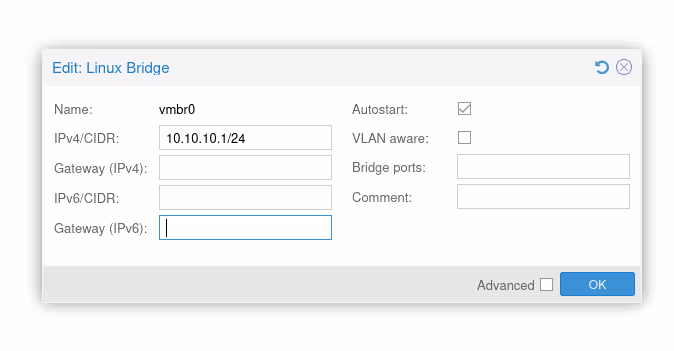
The idea here is to remove the interface from the bridge, configure the network directly on it, and give a local network for our VMs on the bridge, while adding iptables rules for masquerading.
As long as we don’t click the Apply Configuration button, we’re not “at risk”.
The problem with the UI is that we’ll only be able to modify the IPs, gateways, and interfaces on the bridge or not. But to do the masquerading and have our virtual machines access the Internet, we need to add the famous iptables rules I’m talking about just before and we can’t do it from the UI.
We’ll need to add the last five lines in the vmbr0 configuration…
cat /etc/network/interfaces
[...]
auto vmbr0
iface vmbr0 inet static
        address 10.10.10.1/24
        bridge-ports none
        bridge-stp off
        bridge-fd 0

        # add for masquerading to work
        post-up   echo 1 > /proc/sys/net/ipv4/ip_forward
        post-up   iptables -t nat -A POSTROUTING -s '10.10.10.0/24' -o enp1s0 -j MASQUERADE
        post-down iptables -t nat -D POSTROUTING -s '10.10.10.0/24' -o enp1s0 -j MASQUERADE
        post-up   iptables -t raw -I PREROUTING -i fwbr+ -j CT --zone 1
        post-down iptables -t raw -D PREROUTING -i fwbr+ -j CT --zone 1
Warning: the most important point is to verify that the output interface (-o) has the correct name. Here, my physical interface connected to the Internet is enp1s0, but if yours has a different name, you need to adapt.
From my point of view, the UI is still not completely useless, because it allows us to make the most delicate change (IP swap) with the visual diff and the “apply config” button. The post-up scripts are unlikely to cut off our access.

First Test
We’re far from done (it won’t fit in this article anyway, so might as well rush through…). But I’m sure you’re eager to launch a VM and we should have something functional, though incomplete.
So we’ll do a quick test of our setup to verify that we have a minimally functional hypervisor (meaning without clustering, without SDN, without firewall, without monitoring, without backup… without anything, really).
I started playing around with Talos Linux as a Linux distribution for Kubernetes. To keep it simple, I’ll launch the install of a Talos Node. If it manages to enroll in the Omni interface, it means I have a functional hypervisor, network included.
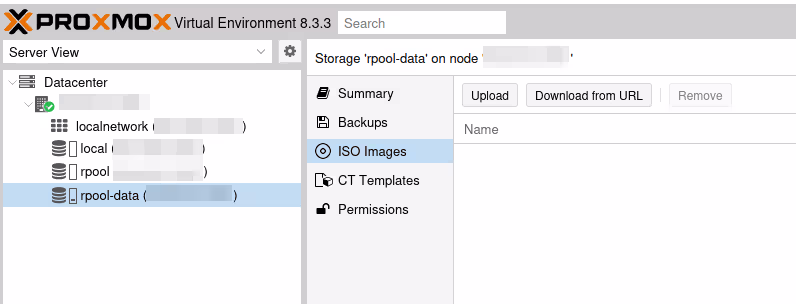
Once the ISO is generated on my Omni site (the SaaS control plane from Sidero Labs, the publisher of Talos Linux), we can push it to our Proxmox VE.
To do this, from our server (so not at the Datacenter level), we select a storage pool that accepts ISO images (if you remember correctly, our ZFS pool doesn’t support it by default), choose ISO Images, and click Upload to upload the ISO.
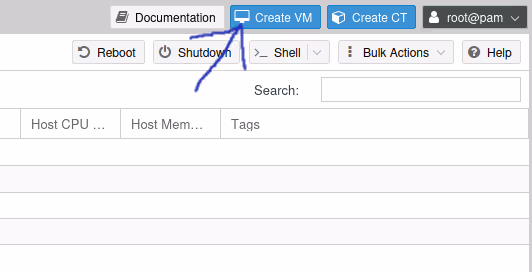
Once uploaded, we can now click the blue button at the top right Create VM.
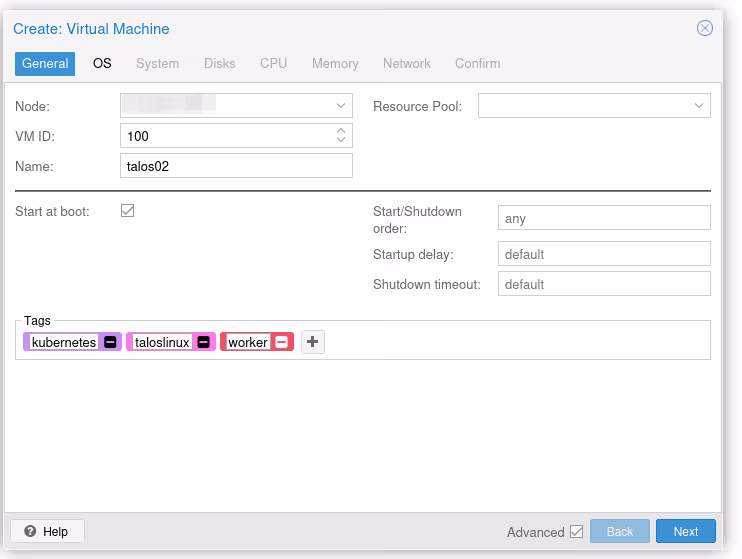
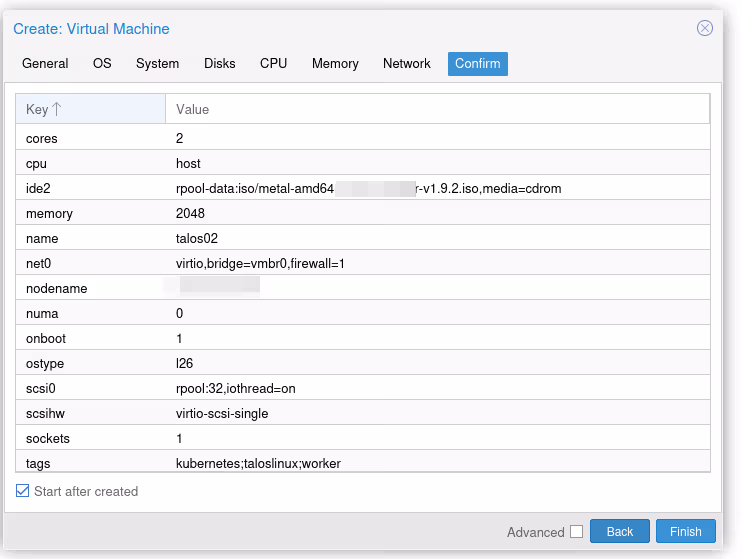
From there, the VM creation wizard should take over. It’s going to be a bit verbose, but all menus are useful when you start to know Proxmox VE well. I’ll give you the minimum though:
In the first menu, we won’t choose which node to install the VM on since for now we only have one… However, we’ll have to give it a unique ID (100 by default) for the entire cluster. Ideally, we also give it a little name. I opted for talos02 (because I already have a talos01 on another server, see how original I am?).
Finally, I checked the “Start at boot” box, that’s the kind of annoying thing when you forget to set it and the hypervisor reboots (it happens)…
You can give tags to your VMs, they’ll have nice colored badges to distinguish them :)
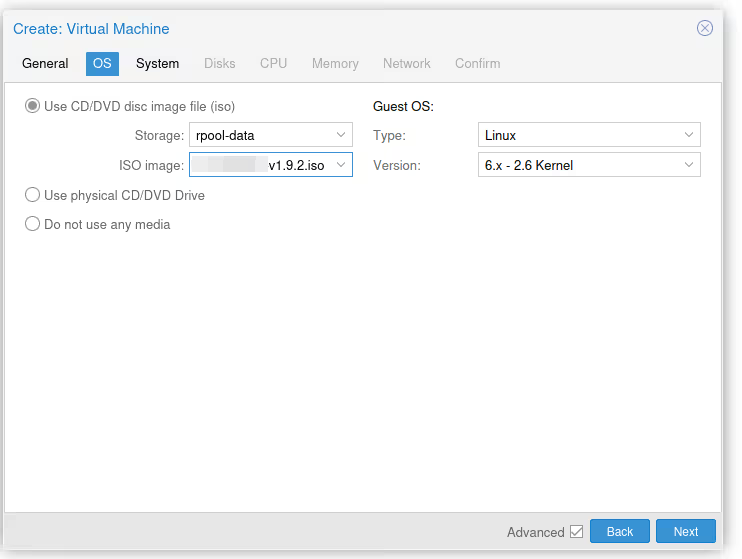
In the second menu (OS), we need to indicate two things. First, that we want to use the ISO we just retrieved/uploaded to boot our machine (you need to choose the right storage pool, by default “local” is selected). We also need to give the OS type for driver compatibility reasons for virtual devices. It’s been a long time since we really needed that, “6.X - 2.6” works for all recent Linux (kernel 2.6 release was in 2003!).
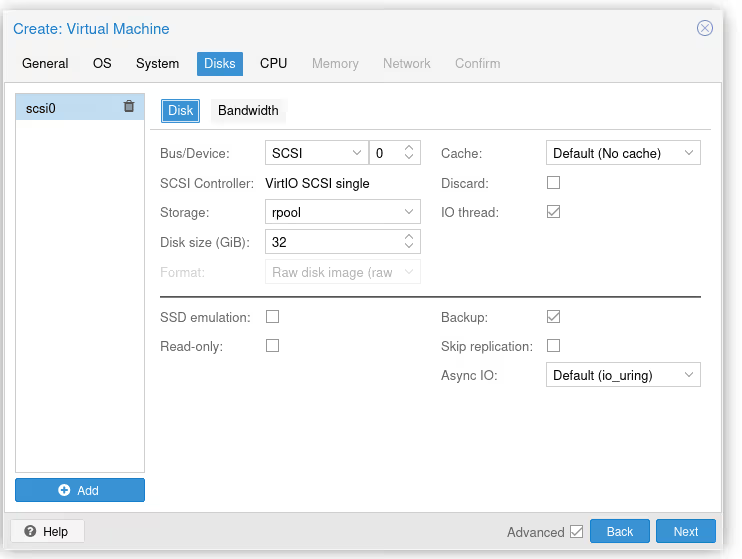
I skip System, in Disks, we add a disk on the right pool (so not local, but the one on ZFS). For my 32 GB Talos VM, that’s more than enough… Note that there are many important options here for everything related to read/write “optimization”, but we’re well beyond the scope of this article.
I skip CPU and memory, the important thing is to give it at least 2 cores and 2 GB of RAM (at least). You can also optimize CPU performance by enabling the right flags, but again, we’re beyond the purpose of the article so I won’t insist.
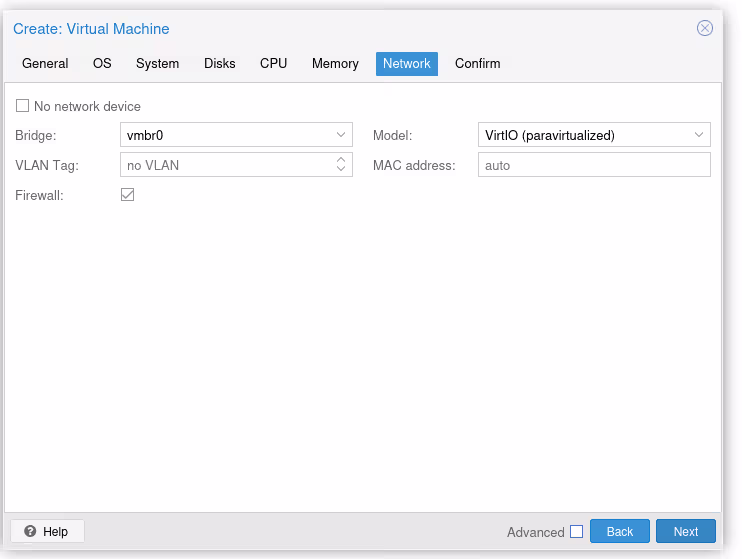
In the network section, we just make sure we’re connected to the right bridge (normally if you followed the article, we only have one, vmbr0, so we can’t go wrong).
And we verify everything is OK. Protip, to save five seconds in your life, click “Start after created”, which will start the VM as soon as possible after creation.
It’s Alive?
At this point, the VM should automatically boot from the Talos CD and the OS should install on the disk. Once ready, the machine will try to enroll on my Omni control plane.
And that’s when disaster strikes…
Because yes, I haven’t configured DHCP or SDN. So we have to manually configure the virtual network card (which isn’t great), by pressing F3 in the console.
(And suffering a bit of QWERTY, but that’s how you recognize a good sysadmin normally: they can do QWERTY in consoles)
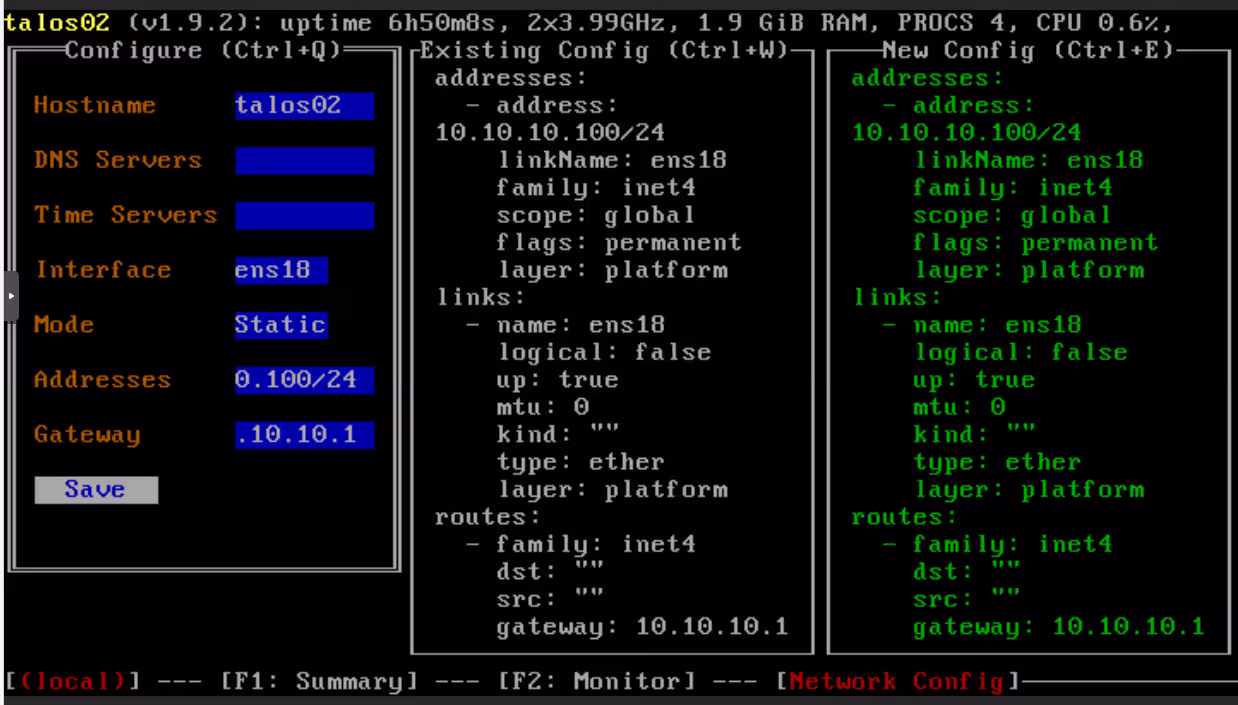
Once the network is configured, the machine should almost instantly start configuring itself…

… and enroll in Omni:
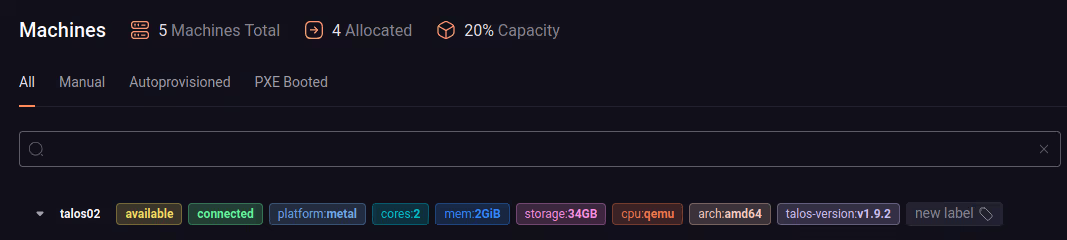
Victory!!
Well…
Well… yes, we have a functional VM. But I aspire to go a bit further before really declaring victory.
As I said above, we had to configure our VM’s network by hand, and we don’t yet have clustering, firewalling, SDN, monitoring, or backup… But we’re comfortably scratching 16,000 characters for this blog post, so it’s time to hang up and say “see you next time”.
And in the meantime, have fun :)