A MicroStack update? 😍
Yes! A few months ago, I introduced you to MicroStack, my 3D printed modular rack project for Dell Micro. The project had unexpected success on MakerWorld / Bluesky (and even a bit on Reddit) and I received several requests to extend compatibility…
And since I’m nice (and I like my 3D printing side projects), I decided to respond to community requests!
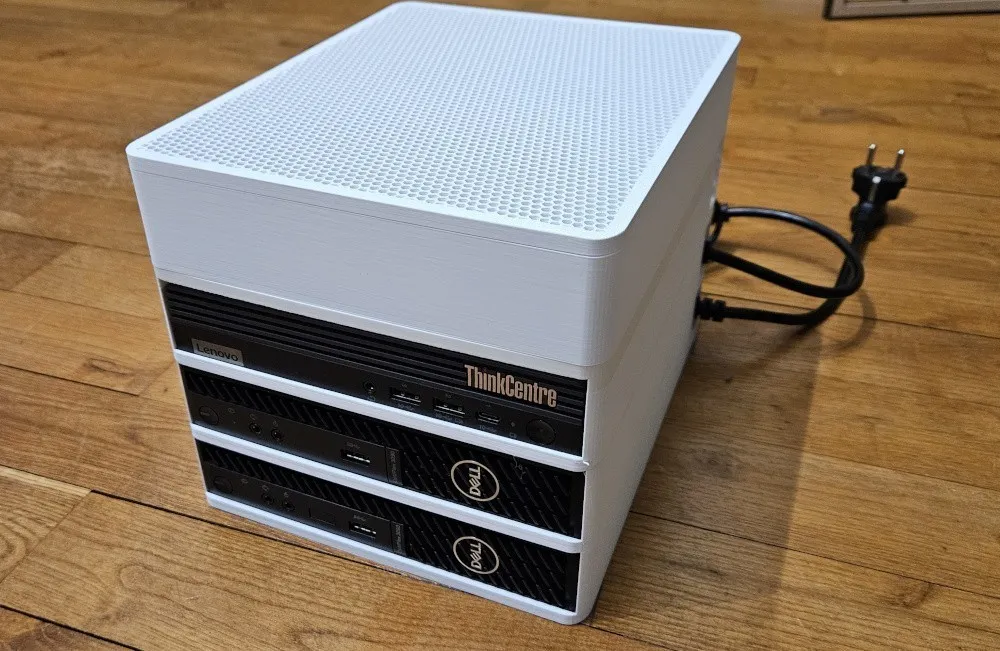
Promise kept: HP EliteDesk and Lenovo ThinkCentre!
In the original article, I mentioned that “a version compatible with Lenovo ThinkCentre Tiny was planned”. Well… it’s done! And I even made a bonus with HP EliteDesk/ProDesk because… why not?
Now, the MicroStack project officially supports three ranges of mini-PCs:
- Dell OptiPlex Micro (all generations) - the pioneer
- Lenovo ThinkCentre Tiny
- HP EliteDesk/ProDesk
A growing ecosystem
The concept remains the same: stackable and modular modules to neatly organize your homelab. But now, you can mix brands in the same rack if you have a heterogeneous fleet (and we all know how it happens in homelabs… “oh look, this used machine is at a good price!”).
The complete MicroStack collection now includes:
PC Modules:
- Dell Micro Module - the original
- Lenovo ThinkCentre Module - the requested one (thanks to a loan from someone on LinkedIn! Thanks!)
- HP EliteDesk/ProDesk Module - the bonus
Common Modules:
- Storage Module - for switch, accessories, etc.
- Hat - clean rack finish
All these modules are inter-compatible and use the same stacking system.
Still the same best practices
As with the original, I still recommend printing in PETG (or even ASA or ABS?) rather than PLA for better heat resistance, even though these mini-PCs remain quite cool. The honeycomb floor design ensures good ventilation while saving filament.
The feedback: multi-range modeling
Adapting the original design to new ranges was simpler than expected, thanks to the solid foundation of the initial project. Once the concept was established with the Dell module, you “just” need to:
- Take (precise!) measurements of the new models (still need to find them…)
- Adapt the chassis dimensions
- Do one (or more) test prints and validate stacking (the stress, every time, of having burned 120g of plastic for nothing if you messed up)
Each new module took me about an hour of modeling, much less than the initial 3x2h of the original project. Prototyping (testing incomplete versions to save plastic) took quite a bit of time, which I had forgotten to count in the previous article. Easily a few more hours.
Community feedback
What makes me happiest is seeing that the project found its audience. The feedback on MakerWorld is generally enthusiastic and the evolution requests show that the concept really meets a need.
Some users have already sent me photos of their mixed installations with different brands in the same rack. This is exactly the modular spirit I wanted to bring to the project!
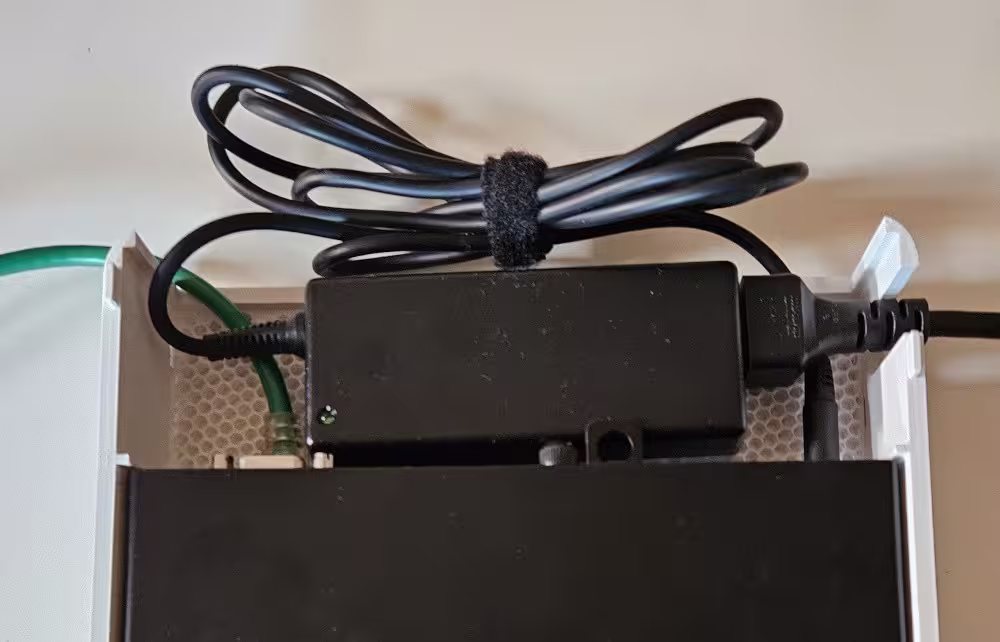
I also had one negative feedback, for which I can’t do much as it stands but which was interesting and allowed me to add a warning. The fact that the back is dedicated to the charger (PSU) blocks some ports, particularly for the Lenovo. The solutions:
- Live with only Ethernet (for a lab, personally I think that’s fine)
- Move the power supplies to the “storage” module
And now?
With these three ranges covered, my MicroStack project becomes really versatile. If you have suggestions for other mini-PCs to support, don’t hesitate! MinisForum, perhaps?
If this project interests you, feel free to comment, share, provide feedback, or even boost the three models for those who have a MakerWorld account (it’s free, but it’s appreciated :-P).