
€2 Thermometers That Become a Financial Drain
From time to time I tell myself I should get into home automation. After an attempt 4 years ago (with Jeedom, I didn’t really get into it in the end), I got back into it with HomeAssistant a little over a year ago.
I’ll detail the setup in another article (spoiler: it’s a VM on my homemade 2024 NAS, with a Bluetooth card with a USB passthrough antenna). For now, know that I started simple with just thermometers in each room.
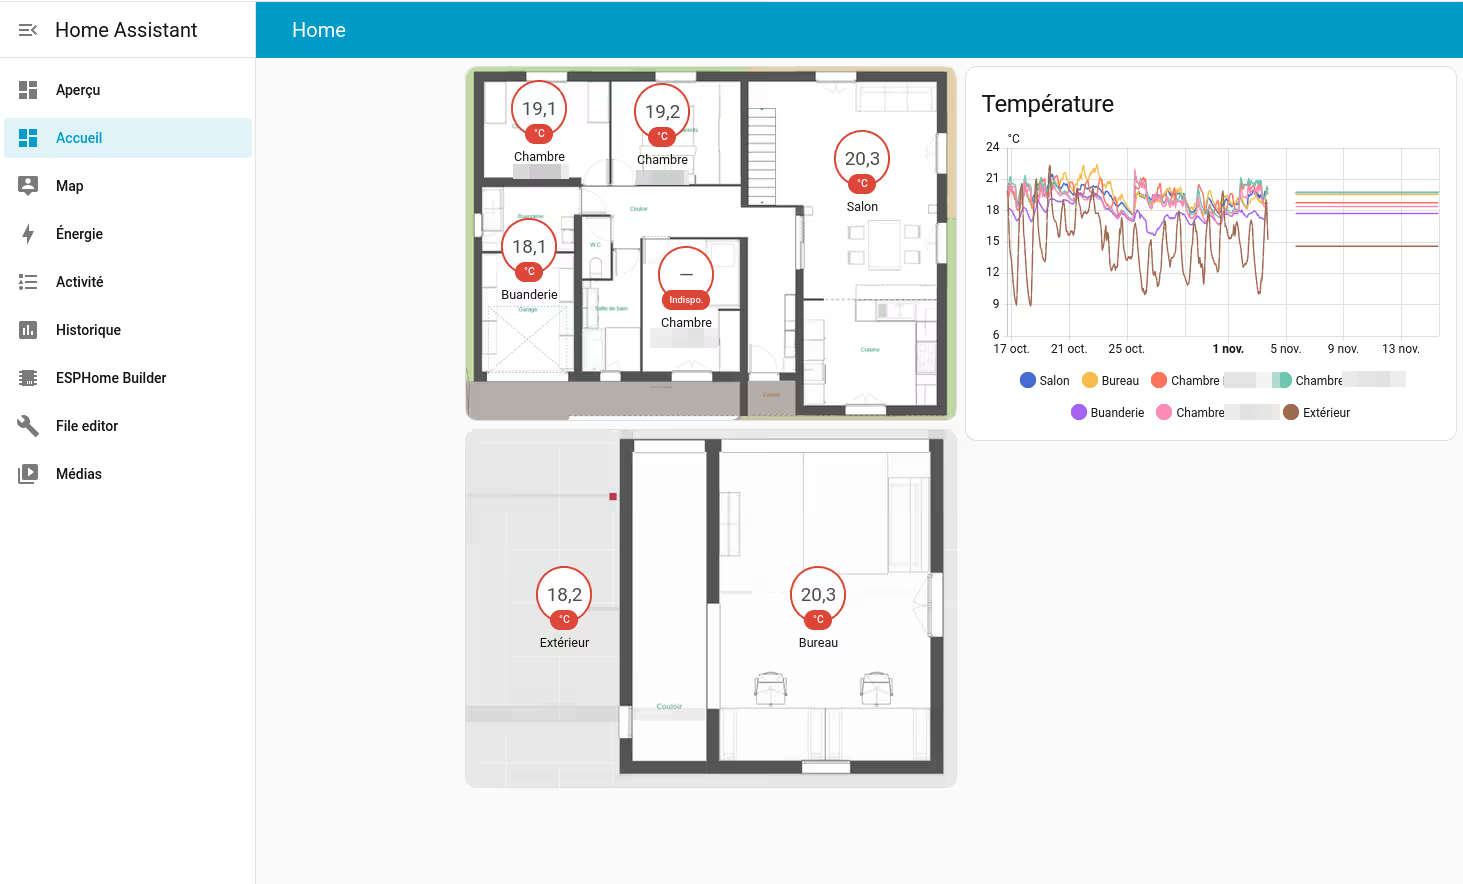
Note: you can see that one room has run out of batteries, and that Home Assistant had been down for 10 days without me noticing haha.
Like many people who want to graph just about everything, even their house (guilty as charged), I started by buying a pack of Xiaomi Mijia thermometer-hygrometers (reference LYWSD03MMC for those in the know).
The main advantage of these little connected thermometers is that they’re very inexpensive: between €1 and €4 depending on sales on AliExpress. Mainly because these are Bluetooth thermometers, much more widespread (and therefore less costly) than Zigbee, Z-Wave equivalents, etc.
You can very easily pair them with a smartphone (Xiaomi provides an app to make it easier) or integrate them into any home automation platform. But the smartphone app is very limited and requires being at very close range (of course).
So, like any self-respecting home automation hobbyist, I connected them to my Home Assistant.
And that’s when the drama started.
As soon as you activate Bluetooth to integrate them with Home Assistant, the CR2032 battery (standard button cell) lasts about 3 months. You very quickly spend more on batteries than on thermometers…
PVVX to the Rescue
Fortunately, the open source community found the solution!
There are two main projects:
- The ATC project by atc1441
- The PVVX fork (which improves the ATC project)
By flashing your sensors’ firmware with the PVVX version, you can go from a few weeks to over a year of battery life.
I can confirm this: it’s now been about a year (last August) since I migrated all my sensors and I haven’t changed a single battery yet! It’s pretty crazy when you think about it.
Non-negligible bonus: the new firmware uses the BTHome v2 protocol, which drastically simplifies integration with Home Assistant (no more fiddling with HACS and stuff; those who know, know).
Required Hardware
What’s cool about this tutorial is that you don’t need much:
- A smartphone (Android or iOS) with Bluetooth
- Your Xiaomi thermometers (LYWSD03MMC)
- An Internet connection
That’s it! No computer, USB-UART cable, soldering iron, or specialized equipment needed. This is really “flashing for dummies” (myself included).
Flashing Procedure: Simpler Than It Seems
Step 1: Open the Web Flasher
Go to the PVVX flasher site with your smartphone:
The flasher works entirely in the browser (not great on Firefox from memory, but 100% OK on Chrome) thanks to the Web Bluetooth API. No app to install, everything happens in the browser. It’s quite magical when you think about it 🤔.
Step 2: Connect the Sensor
Click on the “Connect” button.
Possible confusion: you might think you need to first select the sensor from a dropdown list or something, but no! It’s after clicking “Connect” that a popup opens.
A Bluetooth selection window opens with the list of detected devices nearby.
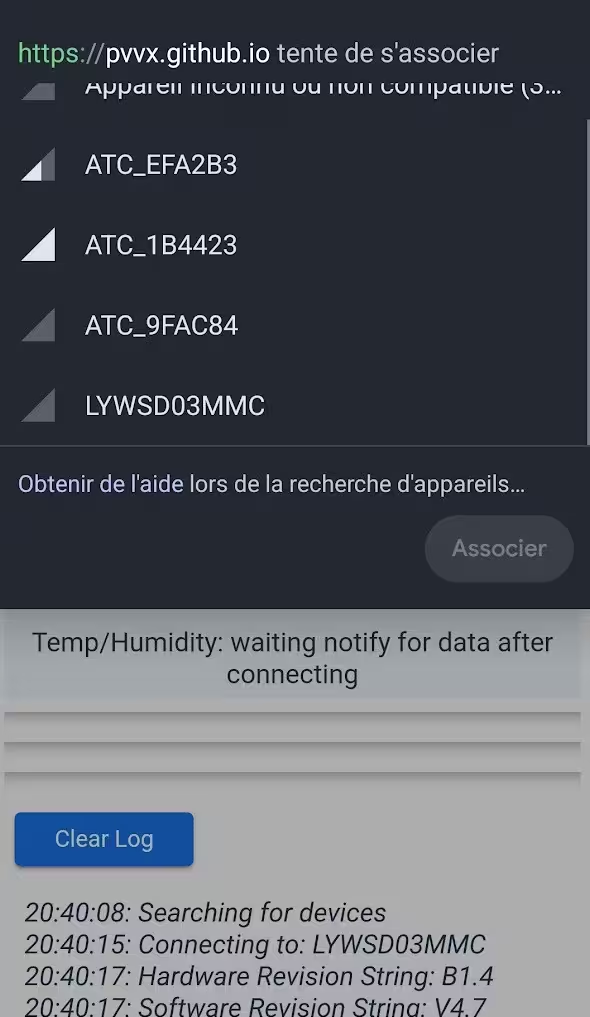
Select your thermometer (it should be called LYWSD03MMC or something similar with numbers) then click “Pair”.
Step 3: Wait for Connection
Once paired, the sensor information will display on the web page.
From experience, it can take a few seconds, or even require a few attempts. Watch the logs at the bottom of the page to see progress. Bluetooth is finicky sometimes (understatement).
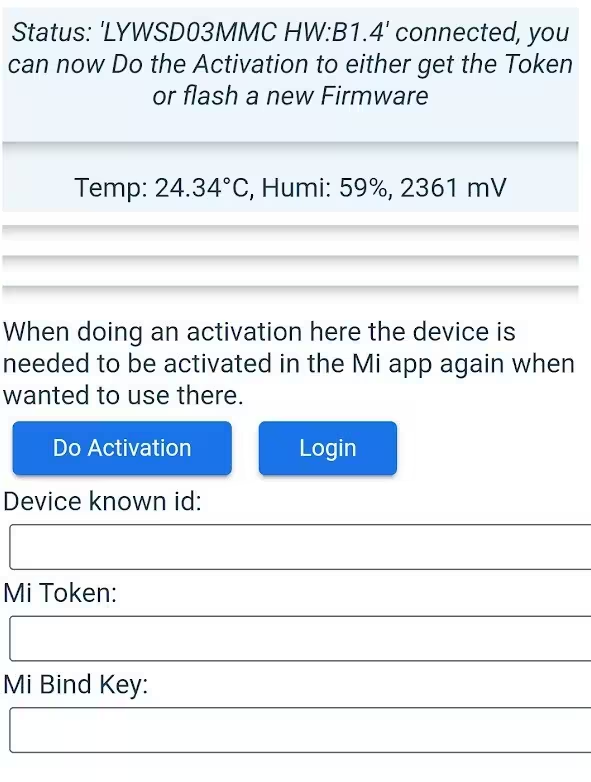
Note: I didn’t really understand if I needed to click “Login” and/or “Activation”. When in doubt, I did both 🤡. It seems to work in all cases, so…
Step 4: Flash the Firmware
Once connected, the list of available firmwares appears.
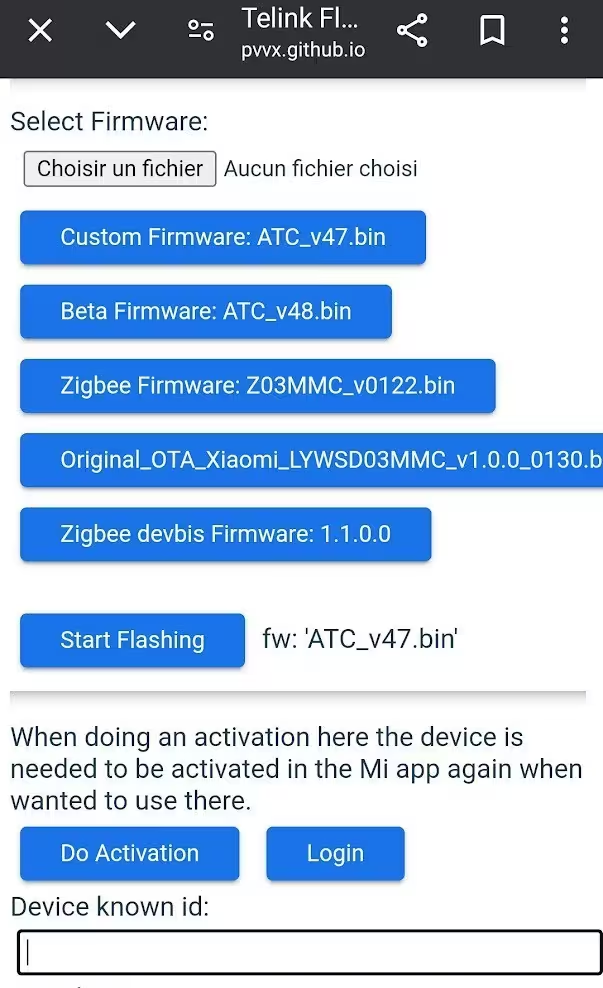
Leave the default choice: ATC_v47.bin (or the most recent version displayed, at the time I’m writing this draft, it was version v47).
Click on “Start Flashing” and… wait with fingers crossed.
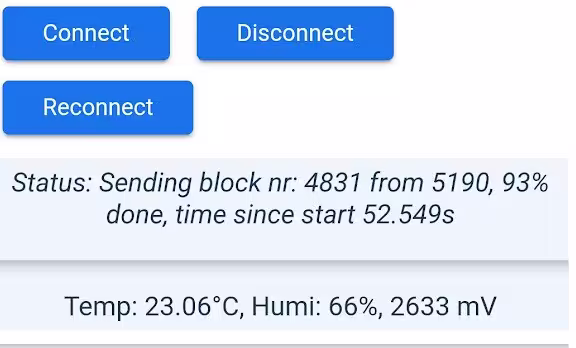
For me, the flash took between 45 and 65 seconds depending on the sensors. Don’t touch anything during this time! Especially don’t leave the web page, otherwise you have to start all over.
Step 5: Verification
Once the flash is complete, the device will temporarily disconnect (a few seconds) then reappear with a new name.
Instead of LYWSD03MMC, it will now be called ATC_XXXXXX (where XXXXXX is a unique identifier based on the MAC address).
Firmware Configuration
Once the sensor is reconnected with its new firmware, you can modify advanced settings if you wish.
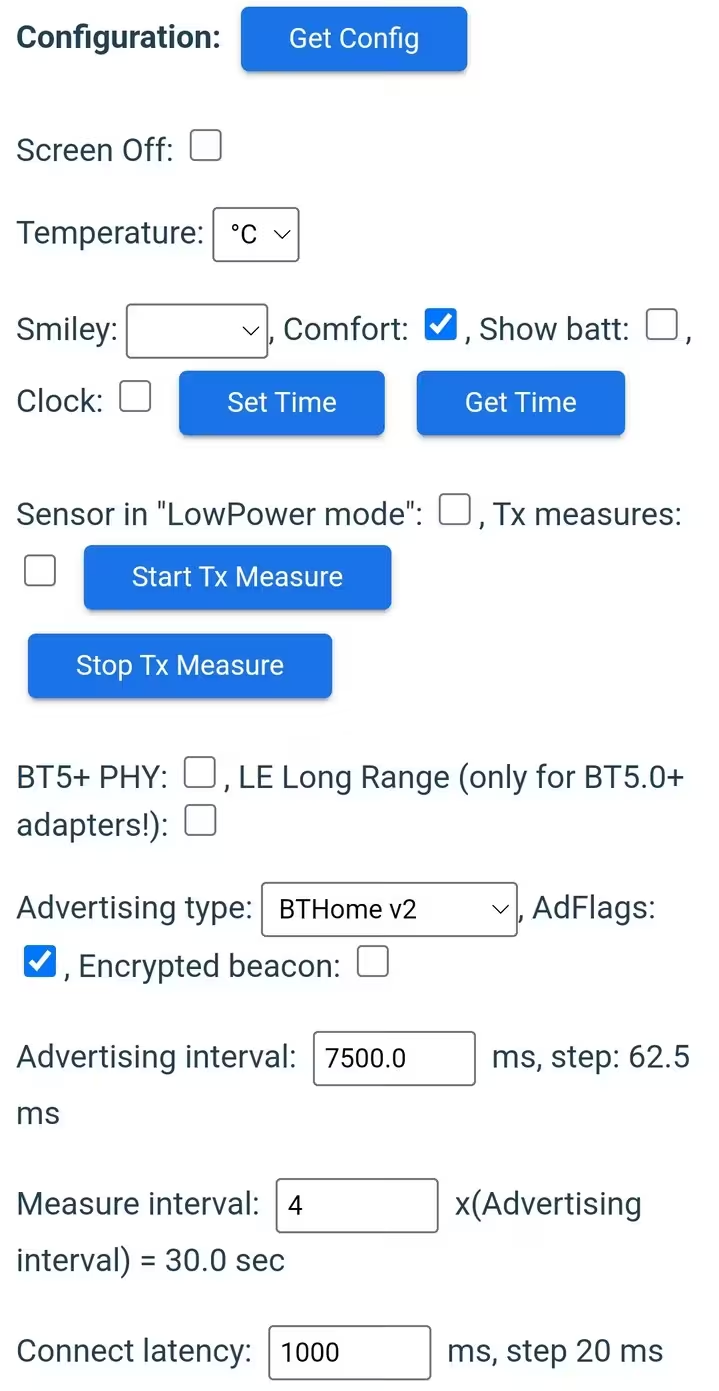
The default values are probably optimal in most cases and you can leave them as is. But if you’re like me and you like to tinker, here’s what I personally modified.
Advertising Interval: Save Even More
I reduced the frequency at which the device does its “advertising” (Bluetooth data broadcast).
- Default value: ~2.5 seconds
- My value: ~7.5 seconds
Advertising Type: BTHome v2 (DON’T TOUCH)
Leave the Advertising Type on BTHome v2 with the AdFlags box checked.
This is the standard protocol promoted by Home Assistant that greatly simplifies communication. With BTHome v2, your sensors will be auto-discovered in Home Assistant without additional configuration.
This wasn’t why I flashed the sensors originally, but it’s really the killer feature!
Beware of Advanced Bluetooth Parameters
Don’t touch BT5+ and LE Long Range options unless you really know what you’re doing.
You risk making your sensor incompatible with your existing installation, and you’ll have to reflash in recovery mode… Not fun.
Integration with Home Assistant
With the PVVX firmware and BTHome v2, integration into Home Assistant is trivial (for once we can say that):
- Make sure you have the BTHome integration enabled (it’s native since 2023)
- Enable Bluetooth on your Home Assistant server
- Your sensors will appear automatically in detected devices
There you go, you can graph the temperature in your house, it’s cool, we’re happy :). As promised, I’ll also (someday) write an article on the more complete configuration on the HomeAssistant side (VM installation, USB passthrough, creating the nice “card”).
In the meantime. Have fun