Introduction
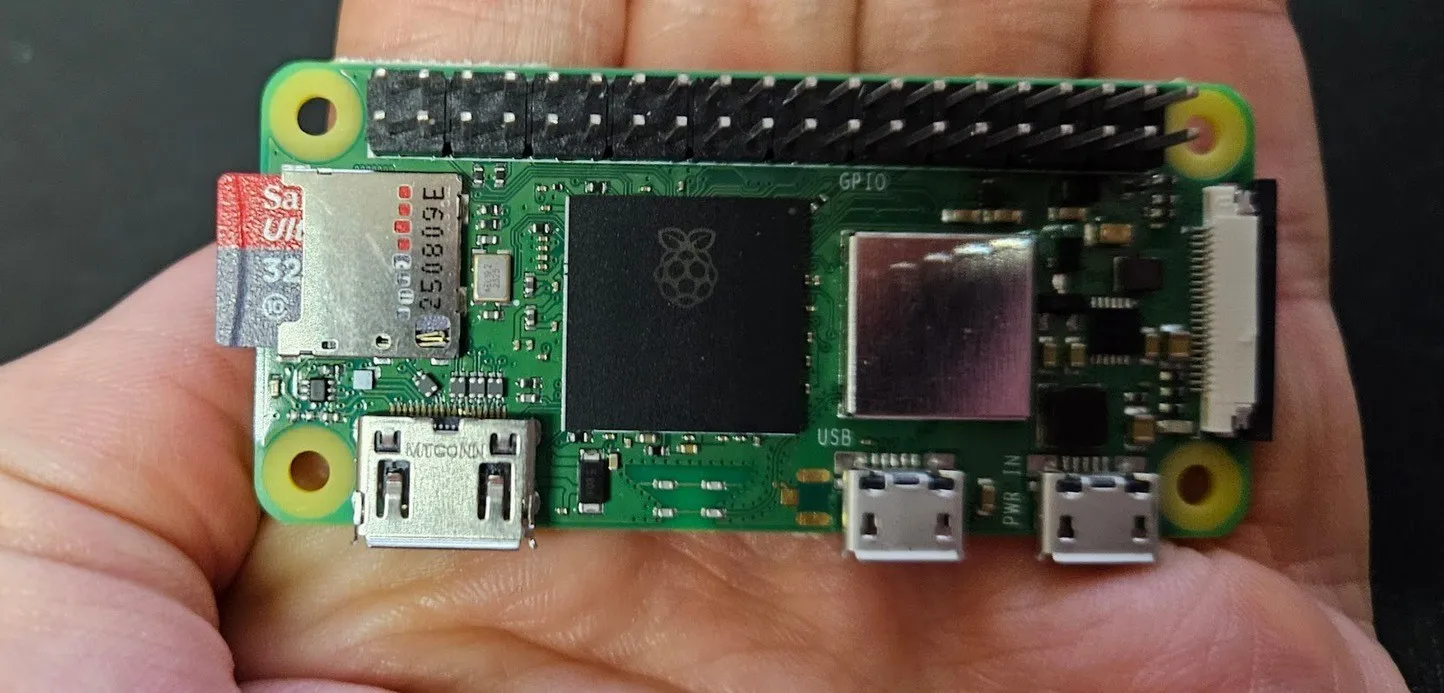
For an article that might be published in print (fingers crossed), I needed to test different OS types to install on a Raspberry Pi Zero 2 W.
Since I was unfamiliar with both Alpine and the specifics of the Pi Zero 2 W, I came across quite a few things I didn’t know.
Even though the print article ultimately doesn’t cover Alpine Linux installation (or even use it), I thought it would be a shame not to publish this Alpine + RPi Zero experience, so here it is.
Why Alpine Linux?
Mainly for its lightness and low resource consumption. On a nano-computer with only 512 MB of RAM, every megabyte counts. Alpine Linux is known for being minimalist and also somewhat controversial (especially in the Docker world) for replacing glibc with musl (which sometimes causes surprises).
The goal of this article is to have a headless installation (without screen or keyboard) accessible via SSH through WiFi, with maximum RAM optimization.
We’ll see lots of interesting technical details, especially about GPU RAM management and swap configuration with zswap!
Downloading the Alpine Linux Image for Raspberry Pi
The first thing to do is download the image before copying it to a microSD card that will be inserted into the RPi before boot.
Fortunately, Alpine Linux offers specific images for Raspberry Pi, so we won’t need to manually add the RPi firmware.
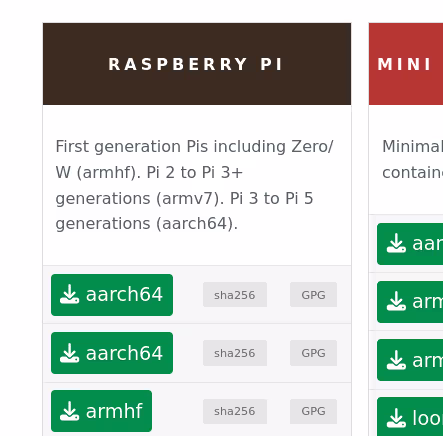
We’ll retrieve the latest available version from the official website. Example:
wget https://dl-cdn.alpinelinux.org/alpine/v3.23/releases/aarch64/alpine-rpi-3.23.2-aarch64.tar.gz
This image is specially compiled for the ARM64 (aarch64) architecture of recent Raspberry Pis (so my RPi Zero 2 W).
Headless Configuration with Overlay File
Once the image is flashed onto your microSD card (with Raspberry Pi Imager for example), we’ll prepare the system for headless access.
Alpine Linux supports what are called “overlay files” that allow you to preconfigure the system before first boot. This is documented in the official documentation on headless installation.
Mount the contents of your microSD card on your machine and place the overlay file at the root of this microSD card:
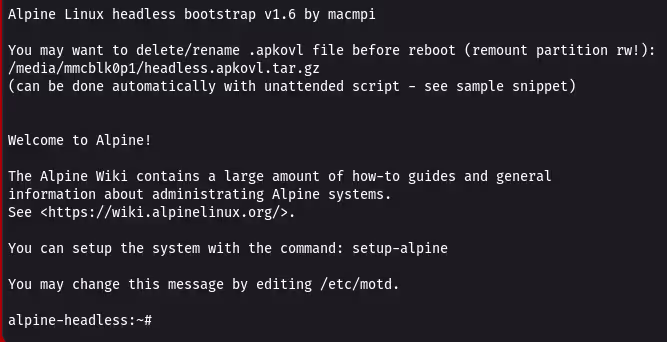
wget https://github.com/macmpi/alpine-linux-headless-bootstrap/raw/469ee440e7d394cca0976c78f357e7a0e1c82cc4/headless.apkovl.tar.gz
Note: it’s quite scary to mount such a sensitive file from a third-party GitHub repo (github.com/macmpi), but Alpine Linux is reassuring by telling us:
Note: The author of above repo macmpi also maintains a number of packages for Alpine Linux.
I’m not much more reassured… but well, it’s “official”
This headless.apkovl.tar.gz file configures Alpine to:
- Boot in DHCP mode
- Enable SSH automatically
- Allow root login without password (be careful not to leave it like that for too long!)
For the Raspberry Pi to automatically connect to your WiFi network, create a wpa_supplicant.conf file at the root of the microSD:
cat > wpa_supplicant.conf << EOF
country=FR

network={
    key_mgmt=WPA-PSK
    ssid="mySSID"
    psk="myPassPhrase"
}
EOF
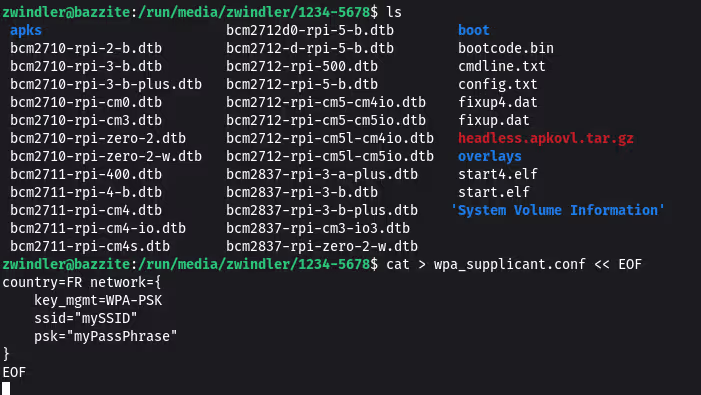
Obviously replace mySSID and myPassPhrase with your WiFi information.
Note: The alpine-linux-headless-bootstrap project offers other very useful configuration options, such as setting a root password, a static IP address, etc. More info in their README.
First Boot and Permanent Installation
Once the first boot is complete, connect via SSH:
ssh root@<raspberry_ip>
Warning: By default, the root password is empty! But we don’t need to change that if we perform the following installation immediately.
At this stage, Alpine runs entirely in RAM (“live” image). To install it permanently, we’ll use the setup-alpine utility whose options are described in wiki.alpinelinux.org/wiki/Installation.
setup-alpine
Here’s a small excerpt of the requested information (all quite standard for an OS install):
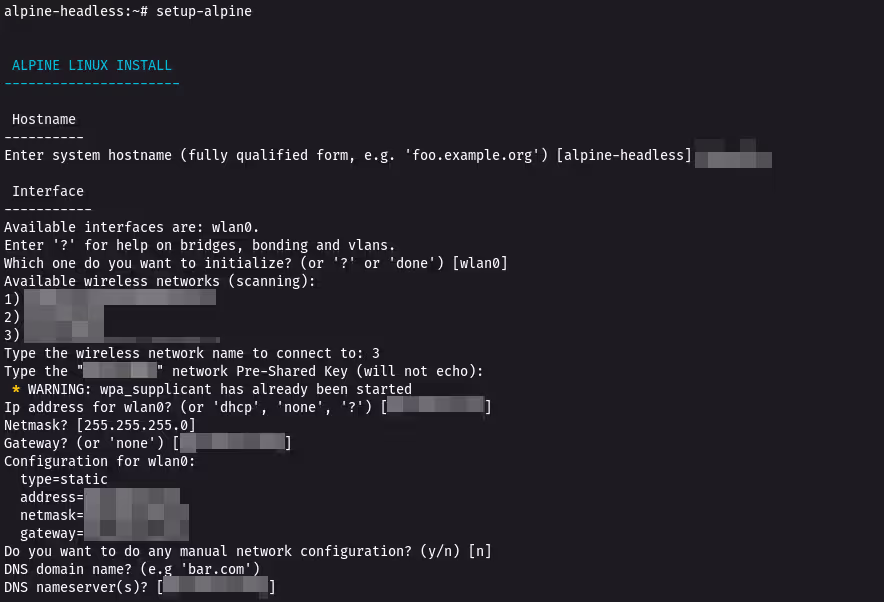
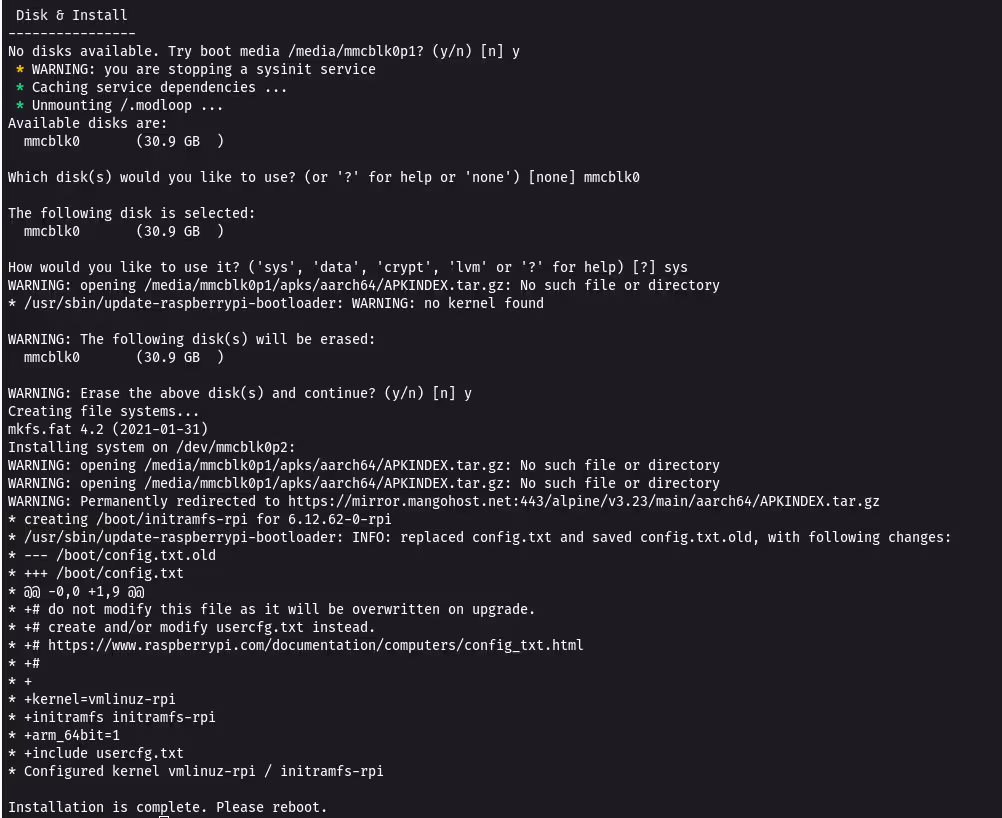
Follow the instructions, then reboot:
reboot
GPU RAM Optimization
By default on a Raspberry Pi, a (large) part of the RAM is allocated to the GPU for graphics processing. On a headless server, this is absolutely useless.
Let’s first check the available RAM before optimization:
free -m
              total        used        free      shared  buff/cache   available
Mem:            417          37         325           0          55         369
Swap:             0           0           0
Only 417 MB available out of the theoretical 512 MB. Let’s see how to recover those precious megabytes.
Ideally, we want to set the gpu_mem=16 option in /boot/config.txt to allocate only 16 MB to the GPU (we can’t set less, and it must be multiples of 16).
But be careful, there’s a trap!

(a french mème, sorry english speakers)
When you set gpu_mem to 16 MB, the Raspberry Pi bootloader attempts to load lightweight firmware files:
start_cd.elffixup_cd.dat
Except these files are not present on your boot partition. If we just put gpu_mem=16 in /boot/config.txt and reboot, the Pi will refuse to start (ACT LED usually blinking 4 times).
Solutions to Minimize GPU RAM
You have two options:
Option 1: Set gpu_mem=32 in /boot/config.txt
This is the easy solution (who said lazy?), there’s nothing to do. You still recover 32 MB of RAM.
Option 2: Download the lightweight firmware files (the one I prefer)
We’re not short on a few MB on the microSD card, which is not the case for RAM, where every MB counts.
If you really want to go down to 16 MB, retrieve the missing files:
cd /boot
wget https://raw.githubusercontent.com/raspberrypi/firmware/master/boot/start_cd.elf
wget https://raw.githubusercontent.com/raspberrypi/firmware/master/boot/fixup_cd.dat
Then modify /boot/config.txt:
[...]
gpu_mem=16
start_file=start_cd.elf
fixup_file=fixup_cd.dat
After reboot, check the gain:
free -m
              total        used        free      shared  buff/cache   available
Mem:            465          37         393           0          35         416
Swap:             0           0           0
We go from 417 MB to 465 MB available! That’s almost 50 MB recovered, representing about 10% additional RAM. On such a constrained system, this is significant.
Swap Configuration with zswap
On a system with only 512 MB of RAM, it’s highly advisable to configure swap. However, Alpine Linux doesn’t configure it by default. I’ll configure one here with zswap, which compresses memory pages before writing them to disk (which also limits the size of accesses to the microSD card).
Creating the Swapfile
# Create a 2 GB swapfile
fallocate -l 2G /swapfile
chmod 600 /swapfile
mkswap /swapfile
swapon /swapfile
Persistent Configuration
To make the swapfile and zswap persistent across reboots, create /etc/fstab:
echo "/swapfile none swap sw 0 0" >> /etc/fstab
Create a startup script for Alpine:
cat > /etc/local.d/swap.start << 'EOF'
#!/bin/sh
swapon /swapfile
EOF

chmod +x /etc/local.d/swap.start
rc-update add local default
Finally, edit /boot/cmdline.txt and add at the end (on a single line):
zswap.enabled=1 zswap.compressor=lz4 zswap.max_pool_percent=20 zswap.accept_threshold_percent=85 zswap.shrinker_enabled=Y
Some explanations on these parameters:
compressor=lz4: uses lz4, fast and efficient for compressionmax_pool_percent=20: zswap won’t use more than 20% of RAM (~93 MB) as compression cache before writing to the disk swapfileaccept_threshold_percent=85: only accepts compression if the expected compression rate is at least 85%shrinker_enabled=Y: allows automatic freeing of compressed memory if necessary
The principle: zswap acts as a fast cache in RAM (compressed) in front of the 2 GB swapfile on disk. Pages are first compressed in zswap, then evacuated to disk if necessary.
Conclusion
Not really a conclusion to this article, actually.
I hit quite a few “walls”, not knowing how to use Alpine (beyond the uses I had made of it with Docker), and I discovered some subtleties related to the Raspberry Pi Zero firmware that I’ve been tinkering with for a few weeks now.
Hence this article ;-)
Happy hacking! 🚀